How to Download and Installation of Automation Anywhere Software
Overview
Automation Anywhere is one of the leading software in the market right now for RPA and everyone is talking about it. The opportunities in RPA are endless. Most of the tech companies are hiring Automation Anywhere professionals in large numbers currently.
Prerequisites for Express and Custom Standalone Installation
The table below contains the Software Requirements of Automation Anywhere
| Operating System | Microsoft Windows 7.0 SP1 (Minimum) Microsoft Windows Server 2012 R2 (Recommended) |
| Web Server/IIS | Internet Information Services 7.5 onward |
| Dot Net Framework | Microsoft Dot Net 4.6 |
| Data Management System | For Express: Microsoft SQL Server 2014 Express Service Pack 1 (SP1) For Custom Standalone: Microsoft SQL Server 2012 Express/Standard/Enterprise or higher |
The table below contains the Hardware Requirements of Automation Anywhere
| Processor | X64 Server based CPU with minimum 4 Cores and 2 threads |
| RAM | 8 GB |
| Disk Space | 100 GB (Depends upon Repository Size) |
Internet Information Services
- Internet Information Services 10.0 (for Windows 10)
- Internet Information Services 8.5 (for Windows 8.1 & Windows Server 2012 R2)
- Internet Information Services 8.0 (for Windows 8 & Windows Server 2012)
- Internet Information Services 7.5 (for Windows 7 SPI & Windows Server 2008 R2)
- Application Initialization Module for IIS 7.5 (for Windows 7 SPI)
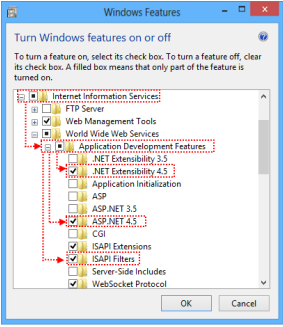
Extra Features
We can enable these features from the Turn Windows Feature On or Off option.
-
- ASP .NET 4.5 or higher
- Dot Net Extensibility 4.5
- ISAPI Filter
-
- Static Content
-
- Windows Authentication (for Active Directory Users)
- IIS Management Service (for Windows 7 SP1)
ENABLING SQL SERVER CONFIGURATION
We have already described in detail how to install and enable the SQL Server in a separate tutorial. The link to which is given here.
PREREQUISITES INSTALLATION
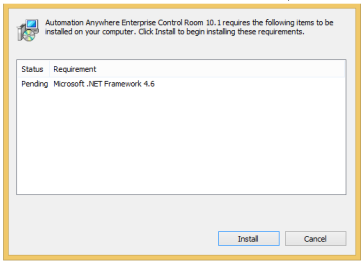
If any of the prerequisites are found missing, the Automation Anywhere Enterprise Control Room setup, installs these prerequisites automatically.
-
- 1. We have to run the Setup in the Administrator Mode for Automation Anywhere Enterprise Control Room.
- 2. If the Dot Net 4.6 part is not available, you will be shown the waiting component screen to install Microsoft Dot Net Framework 4.6 because it is a part of the prerequisites of the Control Room.
-
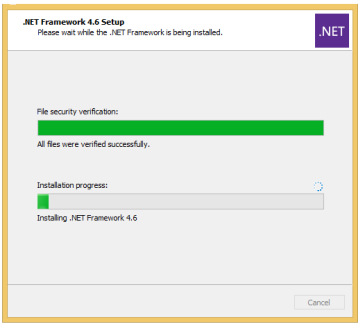
- 3. We have to click on the Install button. This action will start the Microsoft Dot Net Framework 4.6 process for installation.
-
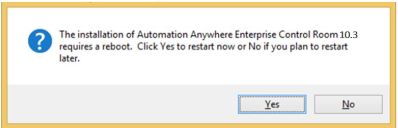
- 4. After this step there is a need to restart the system in order to complete the process of installation. When we restart our systems, the process of installation will automatically resume.
Steps to Install Automation Anywhere using Express Installation Type
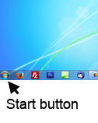
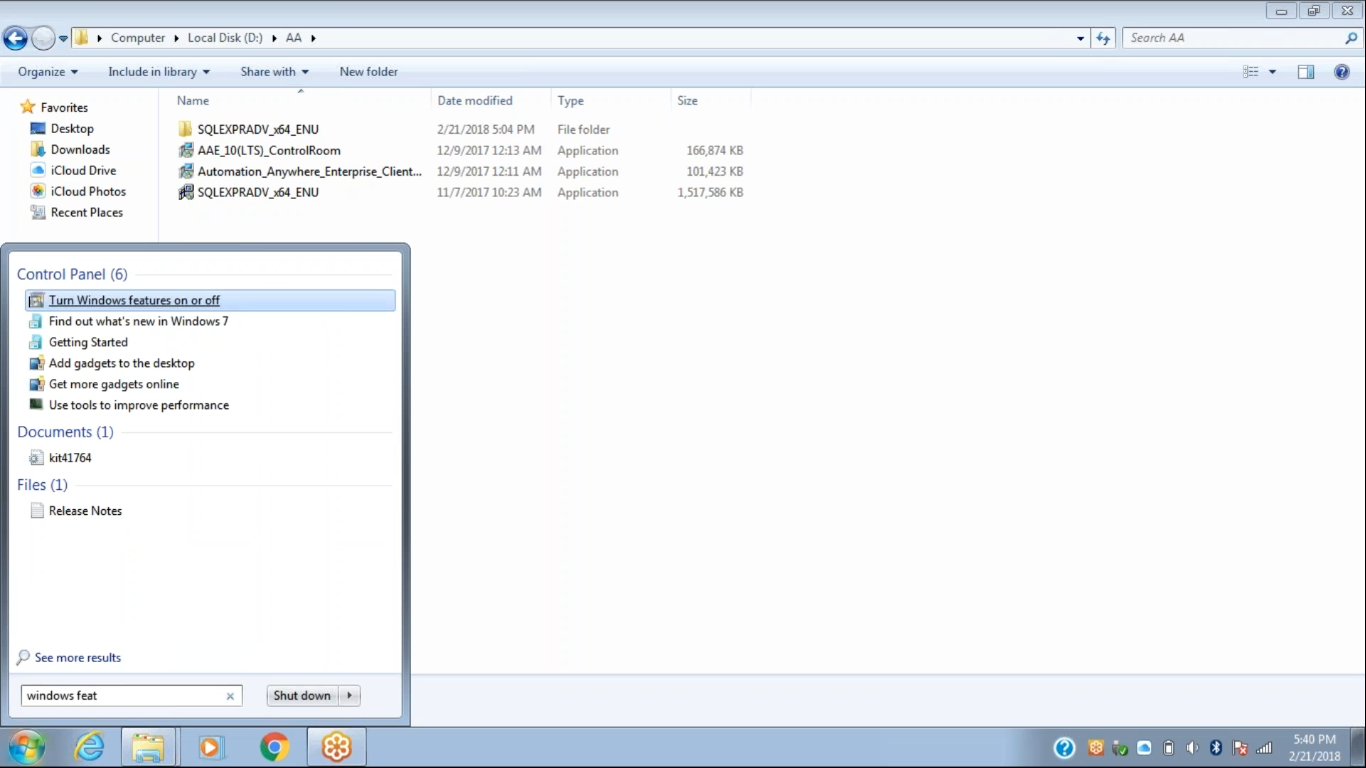
Step 1 – Go to the start button in the Windows taskbar and click on the start button.
Step 2 – In the search bar please type “Turn Windows Features on or off” and click on that option.
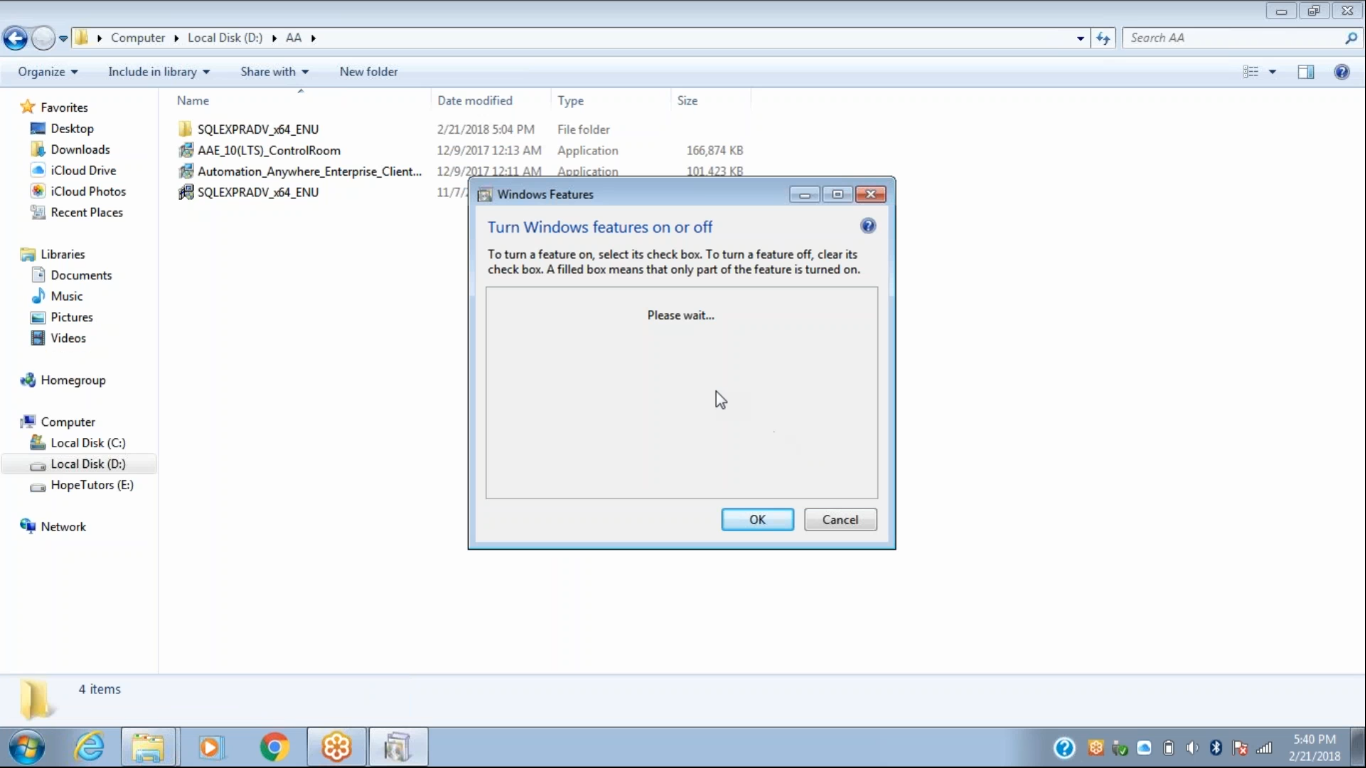
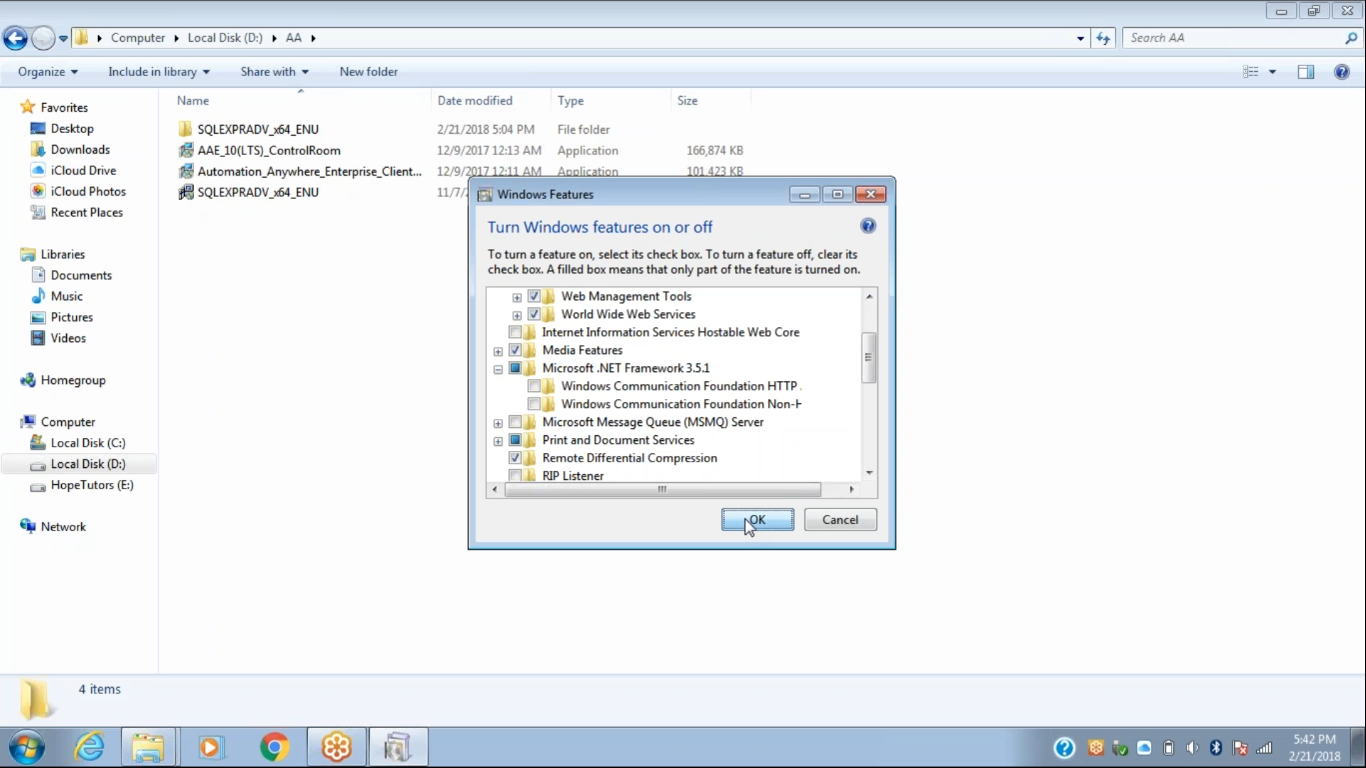
When you click on the features, a windows feature dialog box will pop up which will ask you to wait.
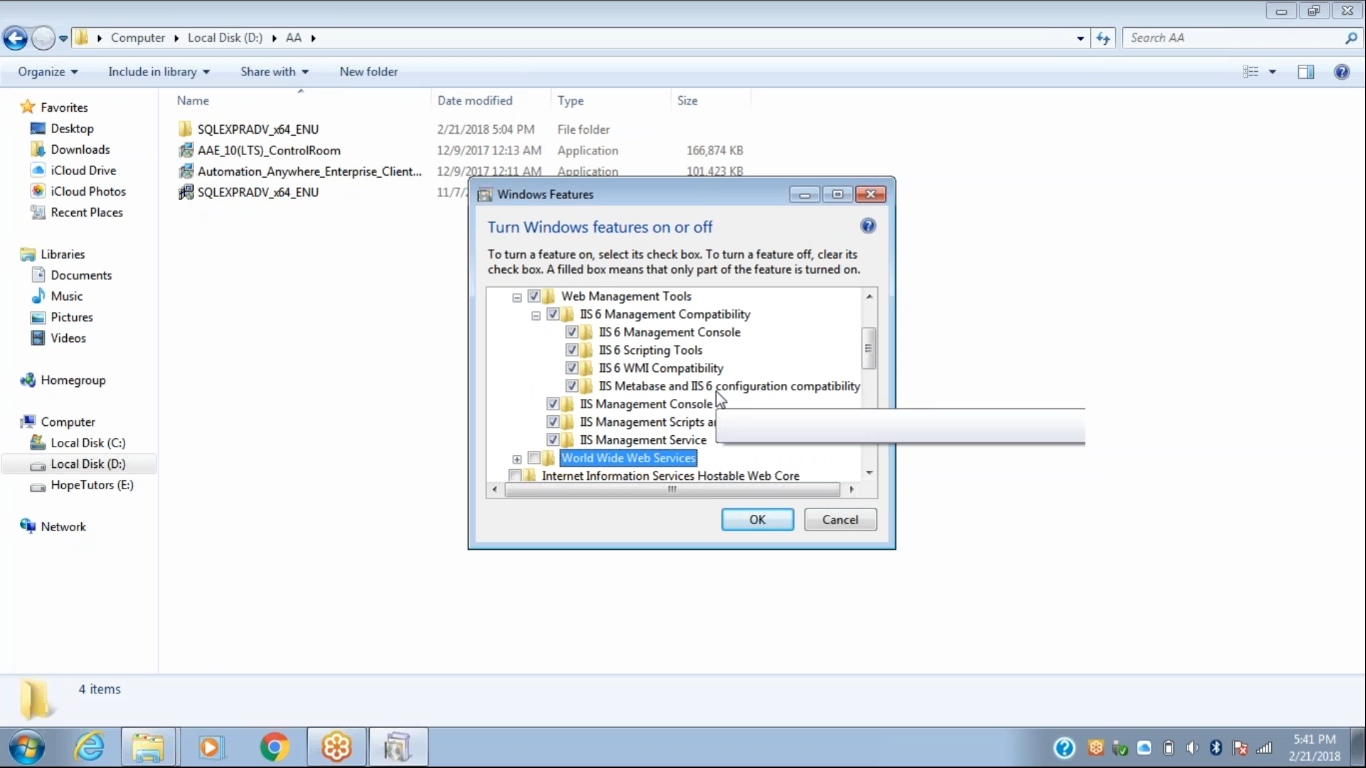
Step 3 – Tick on the box for Internet Explorer 11. Open Internet Information Services. Select Web Management Tools, IIS 6 Management Compatibility. Under IIS 6 Management Compatibility there are 4 options. Choose all of them. Select IIS Management Console, IIS Management Scripts and Tools, and IIS Management Service.
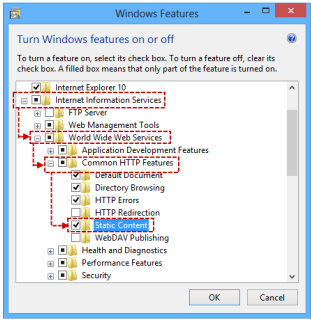
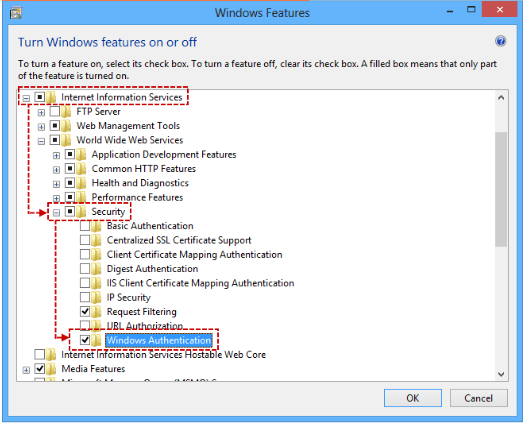
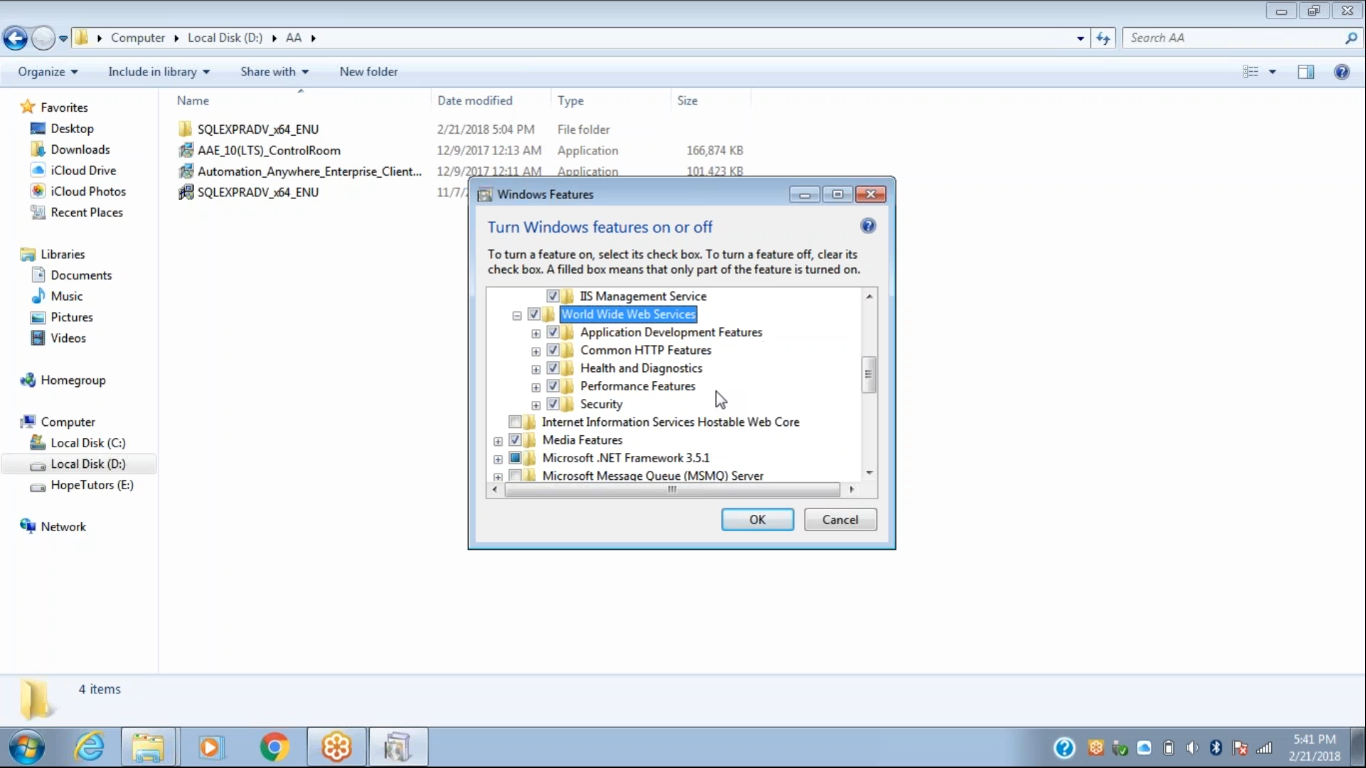
Step 3.1 – After that select World Wide Web Services. Then click on Application Development Features and select all the features included within it. After that choose the Common HTTP Features and click on all the options included within it. The next feature we have to enable is Health and Diagnostics and tick all the boxes within it. Then we have to click on Performance Features and enable all the features inside it. Then we have to click on the Security Feature. Inside the Security Feature, we select all the features within it.
Step 4 – Then we click on the OK button.
After we click on the OK button the following screen appears.

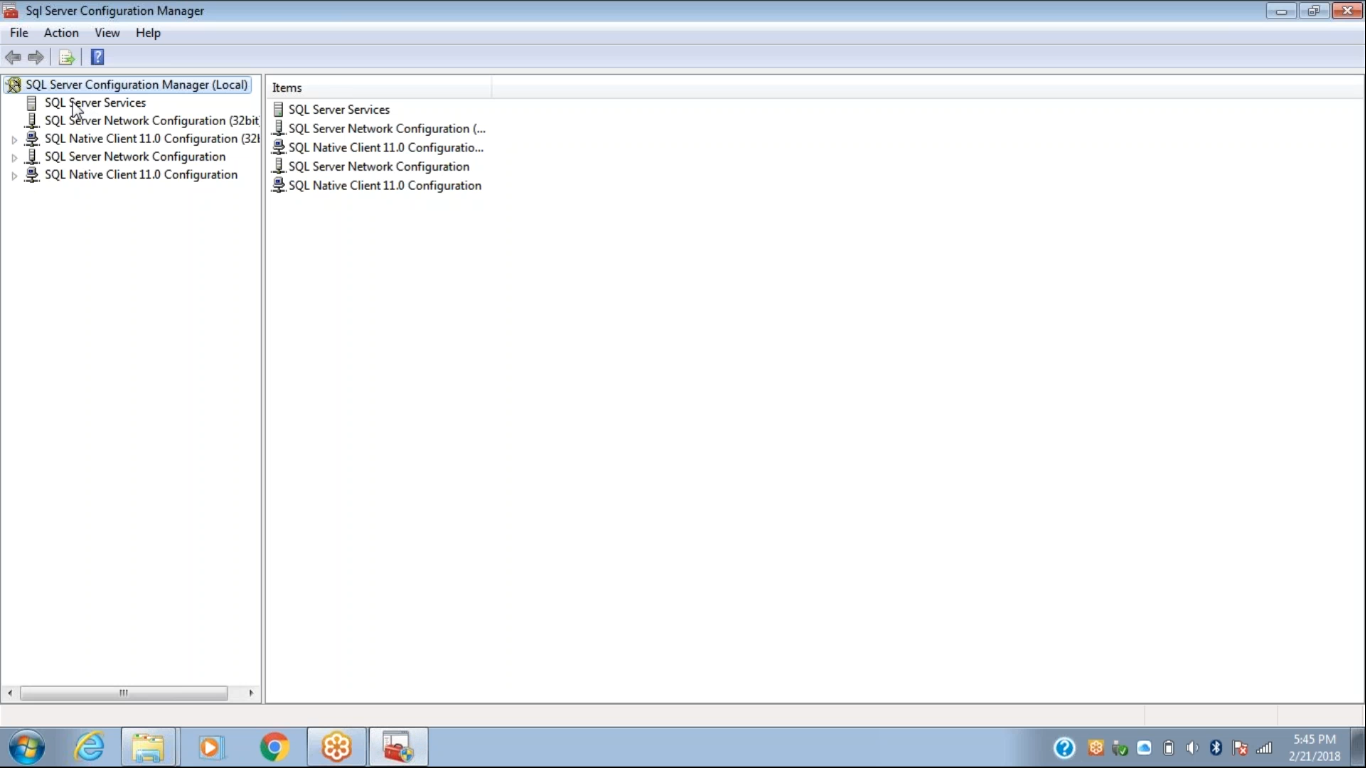
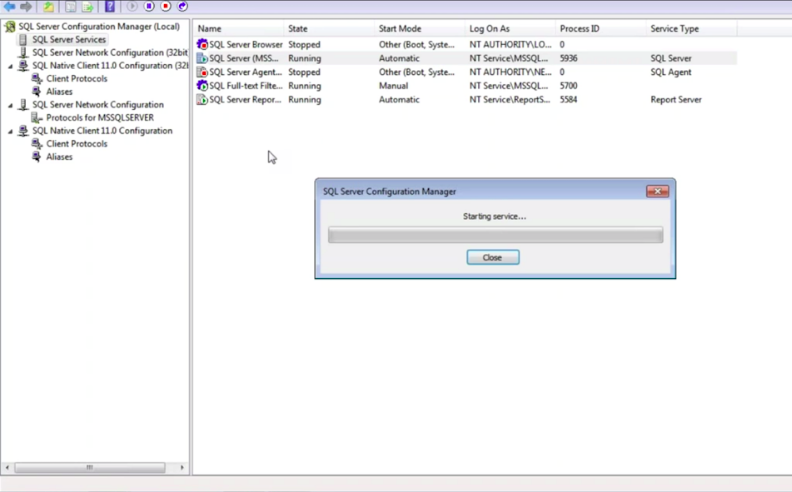
Step 5 – If you wait for about three minutes the SQL Server Configuration Manager button will be shown in the taskbar. We have to click on it and open the window.
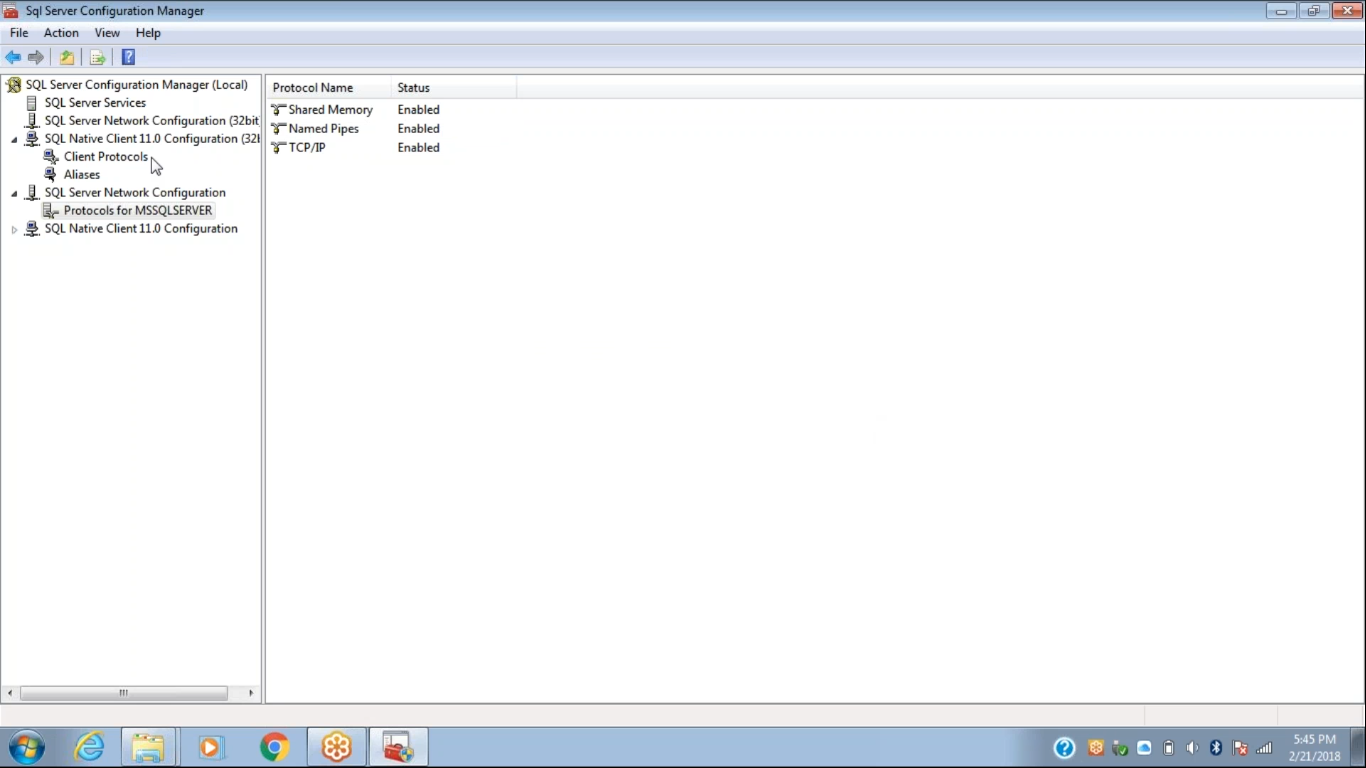
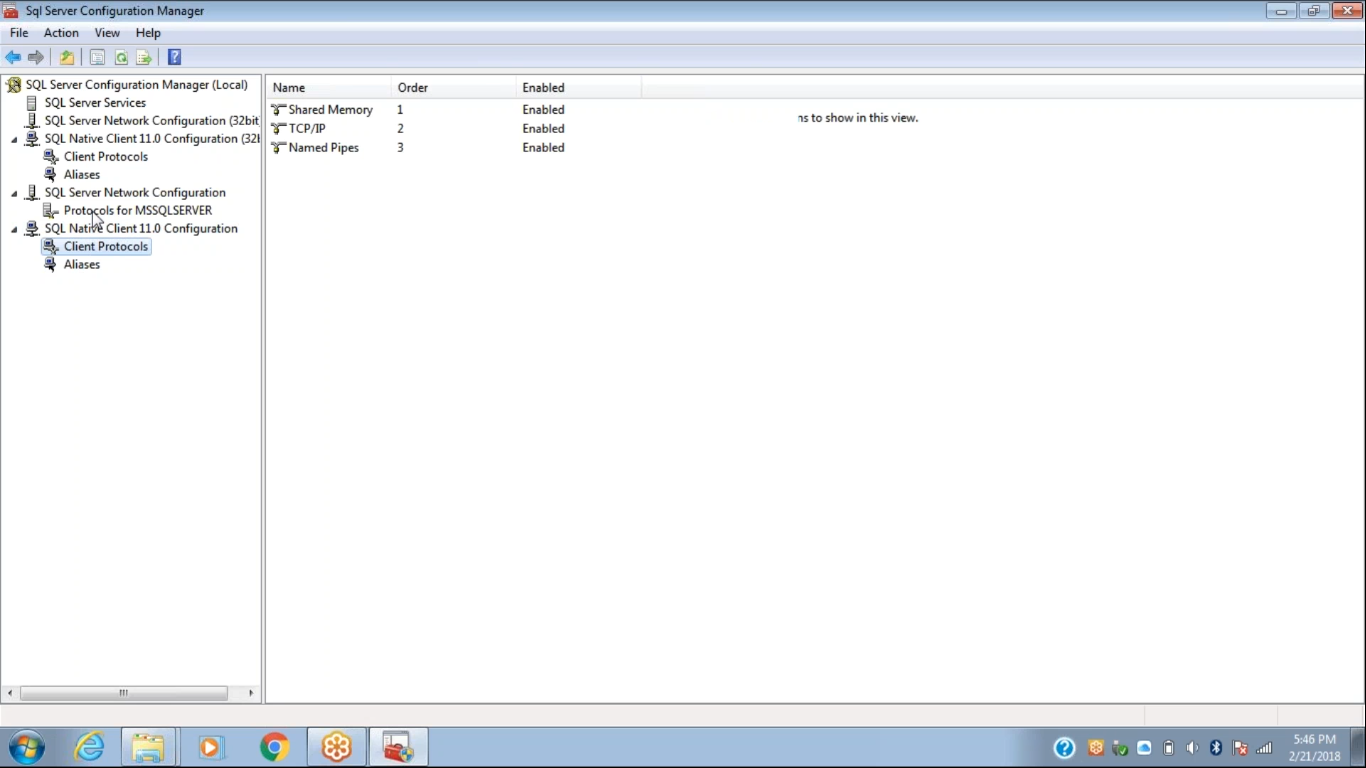
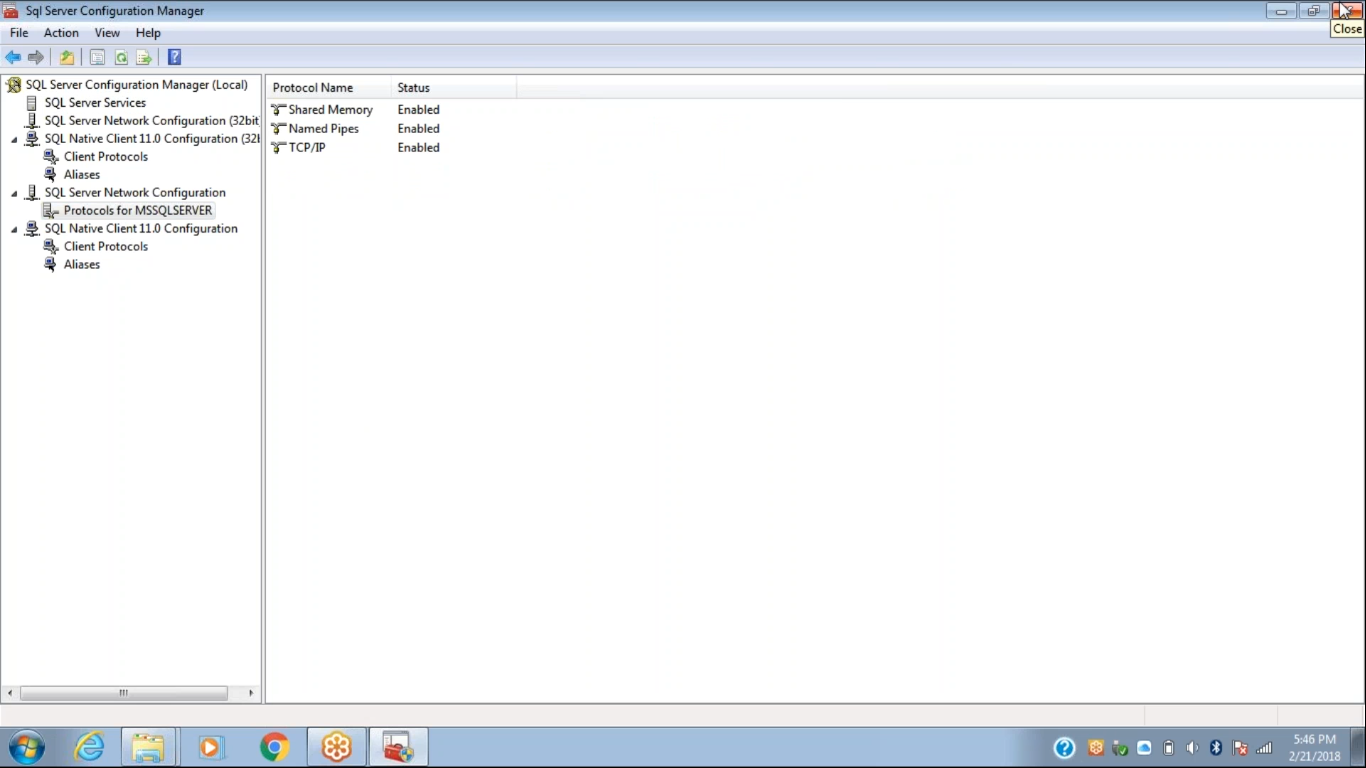
Step 6 – Then we have to click on the SQL Server Network Configuration option. Within that we have to click on the option for Protocols for MSSQL SERVER and then we have to enable all the protocols.
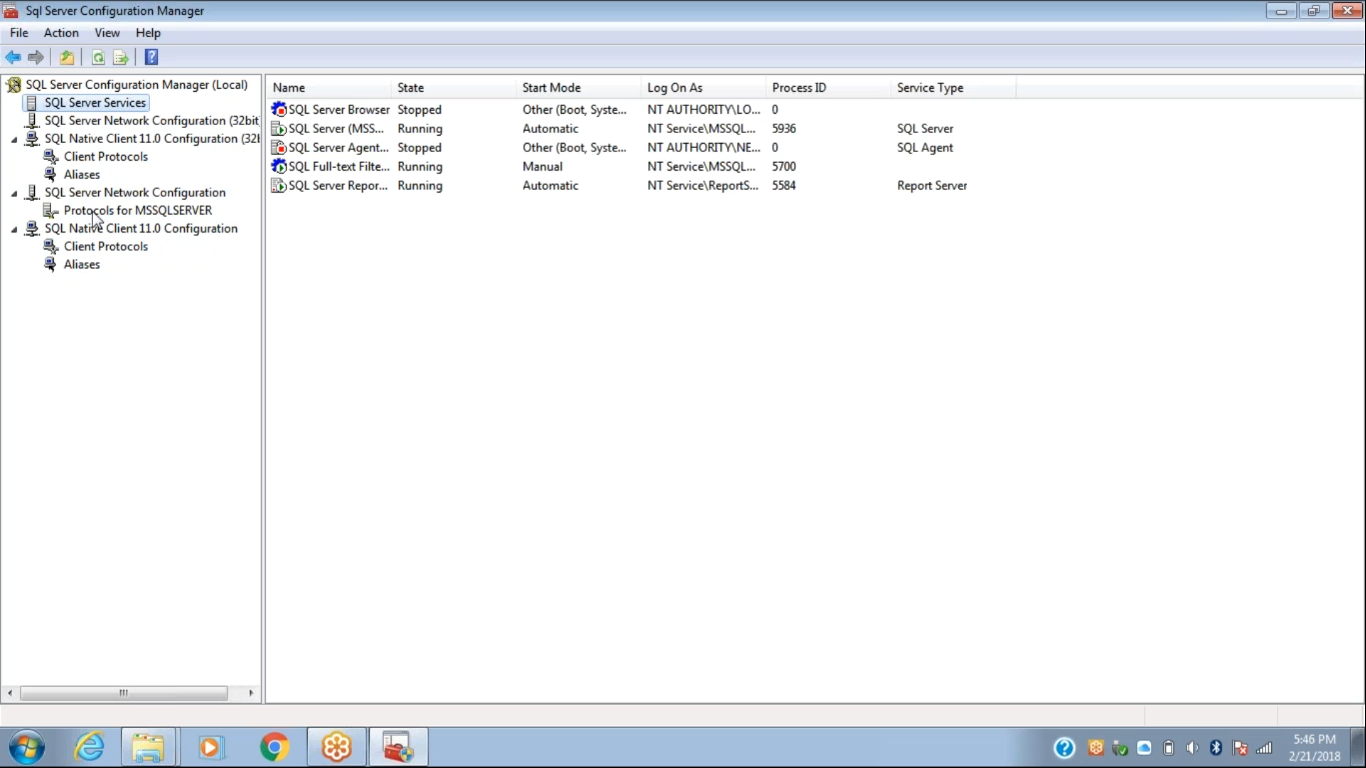
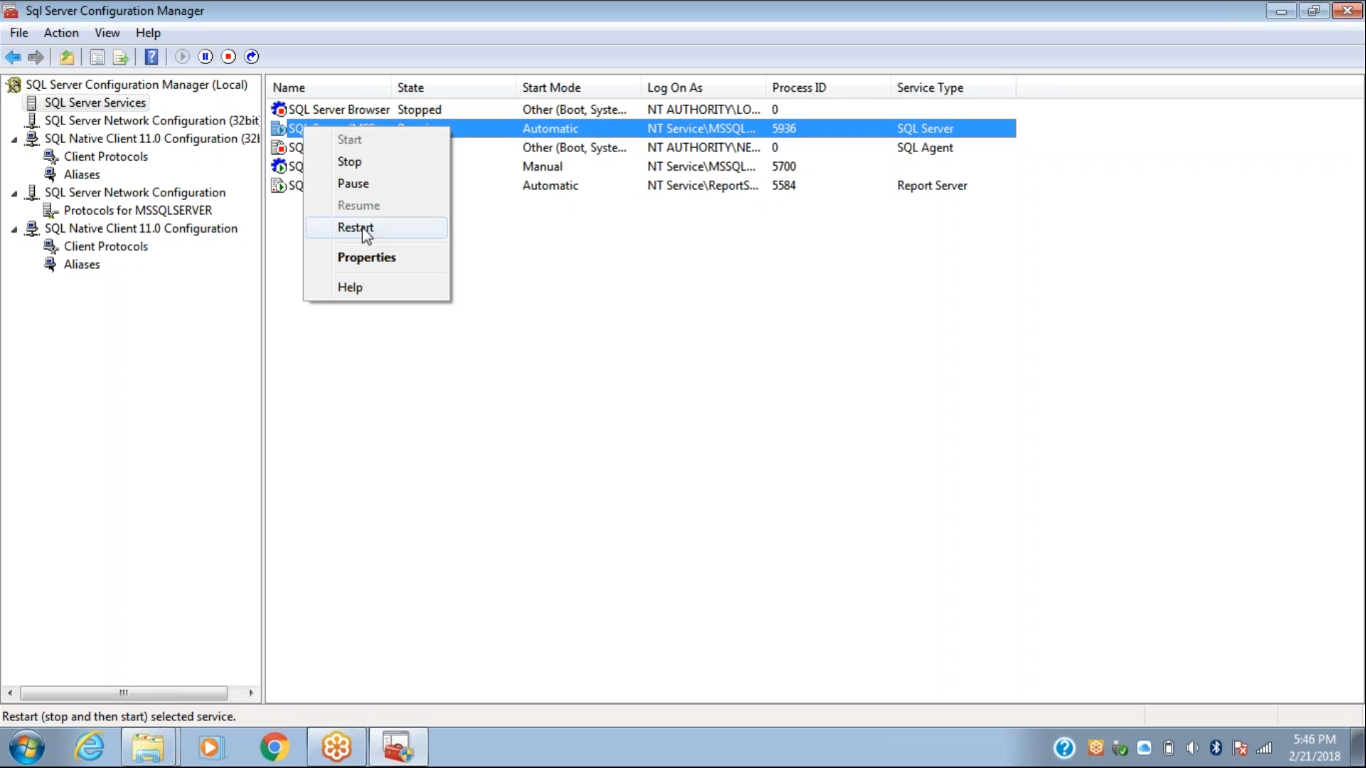
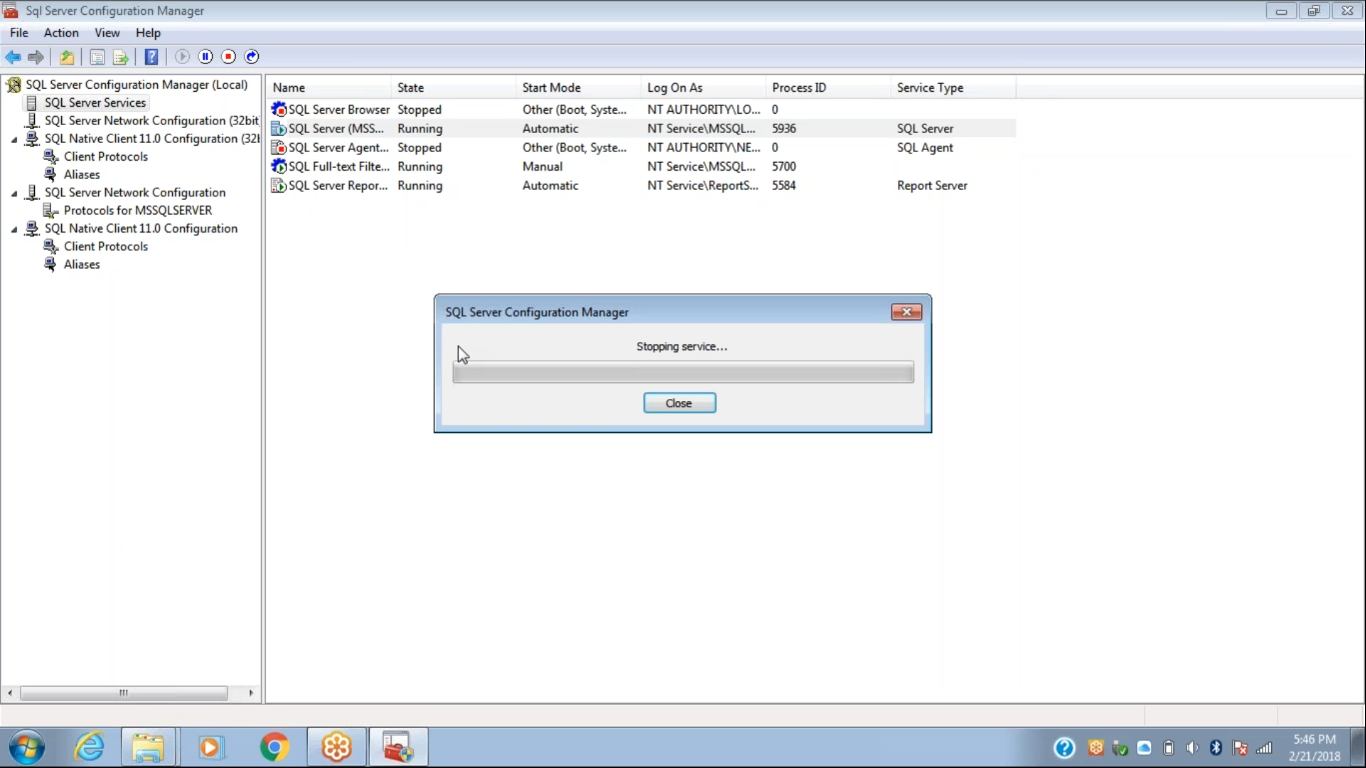
Step 7 – After enabling all the protocols we have to go to the SQL Server Services option on the top left and click on it and then we need to restart by right clicking on the second option which is the SQL Server option. After doing this we need to close the window. The steps are shown in images below.
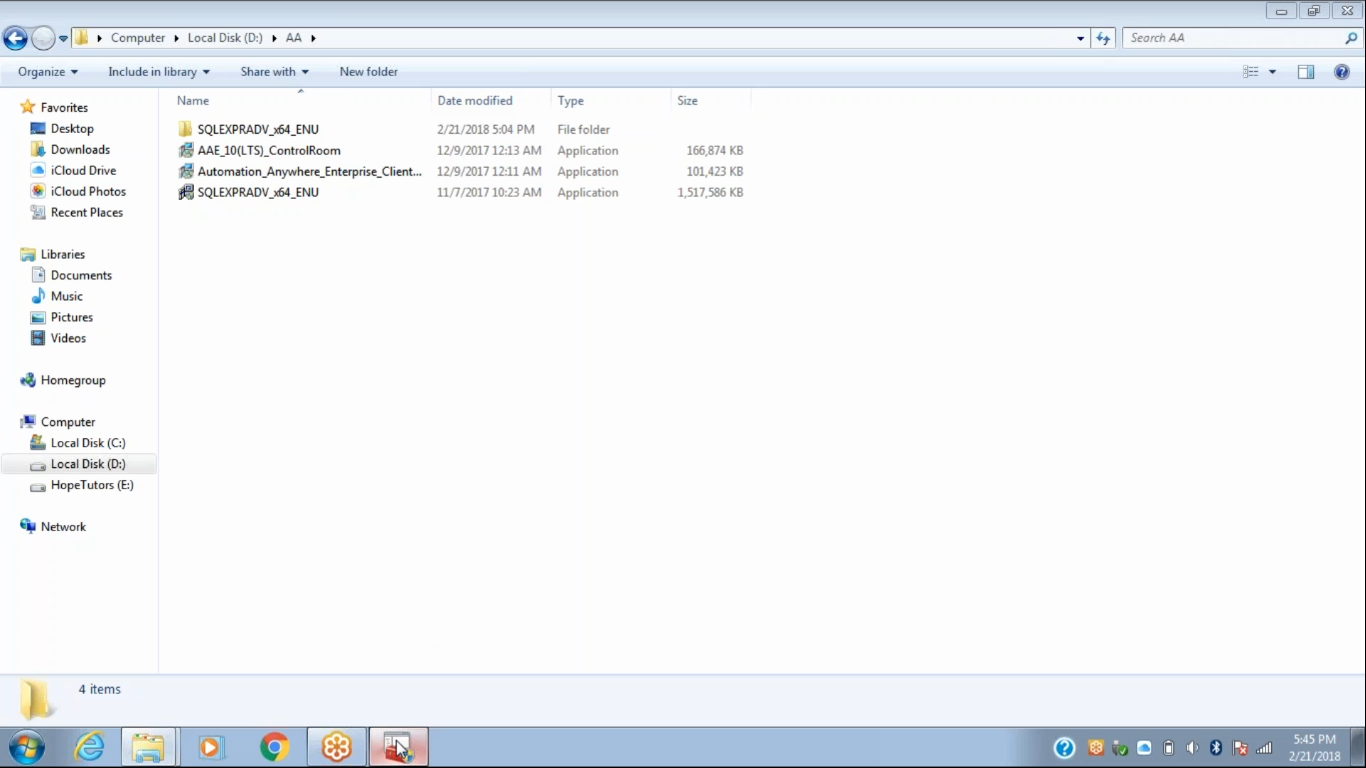
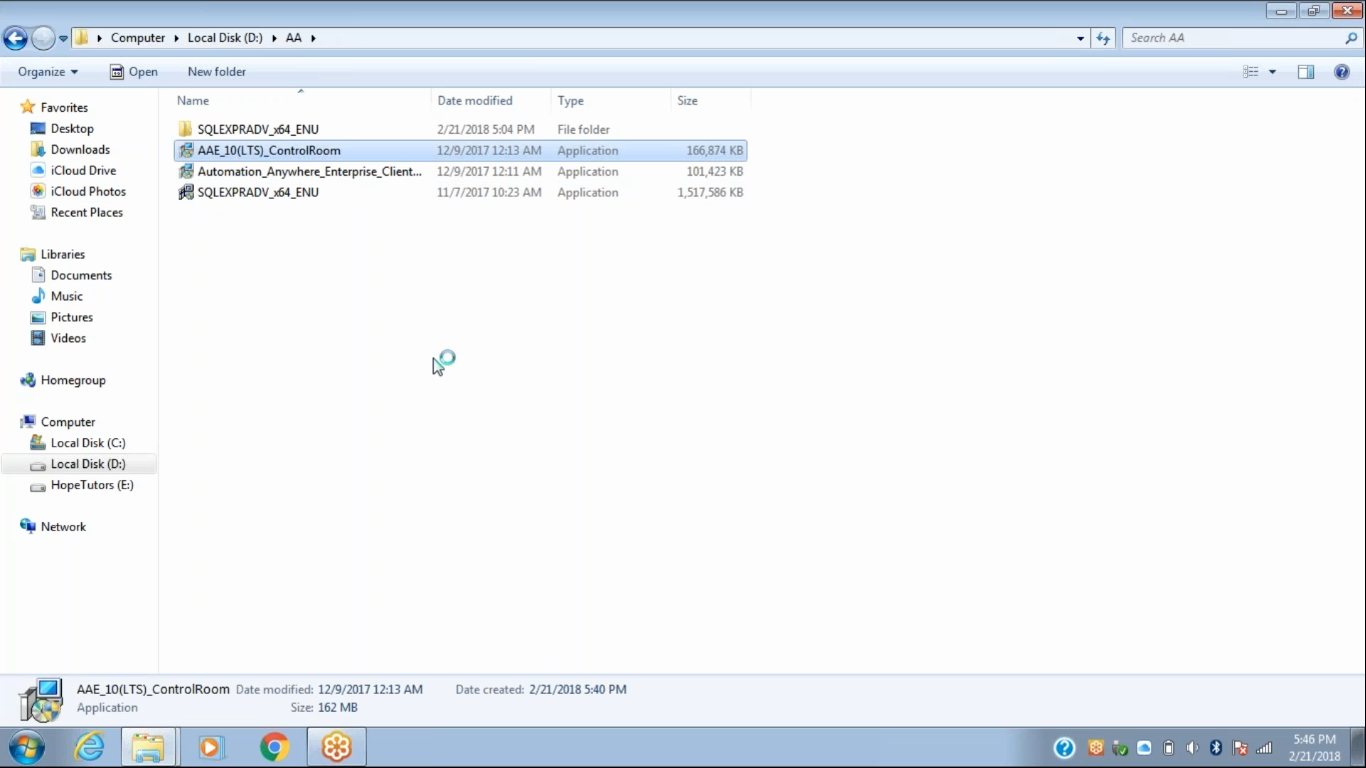
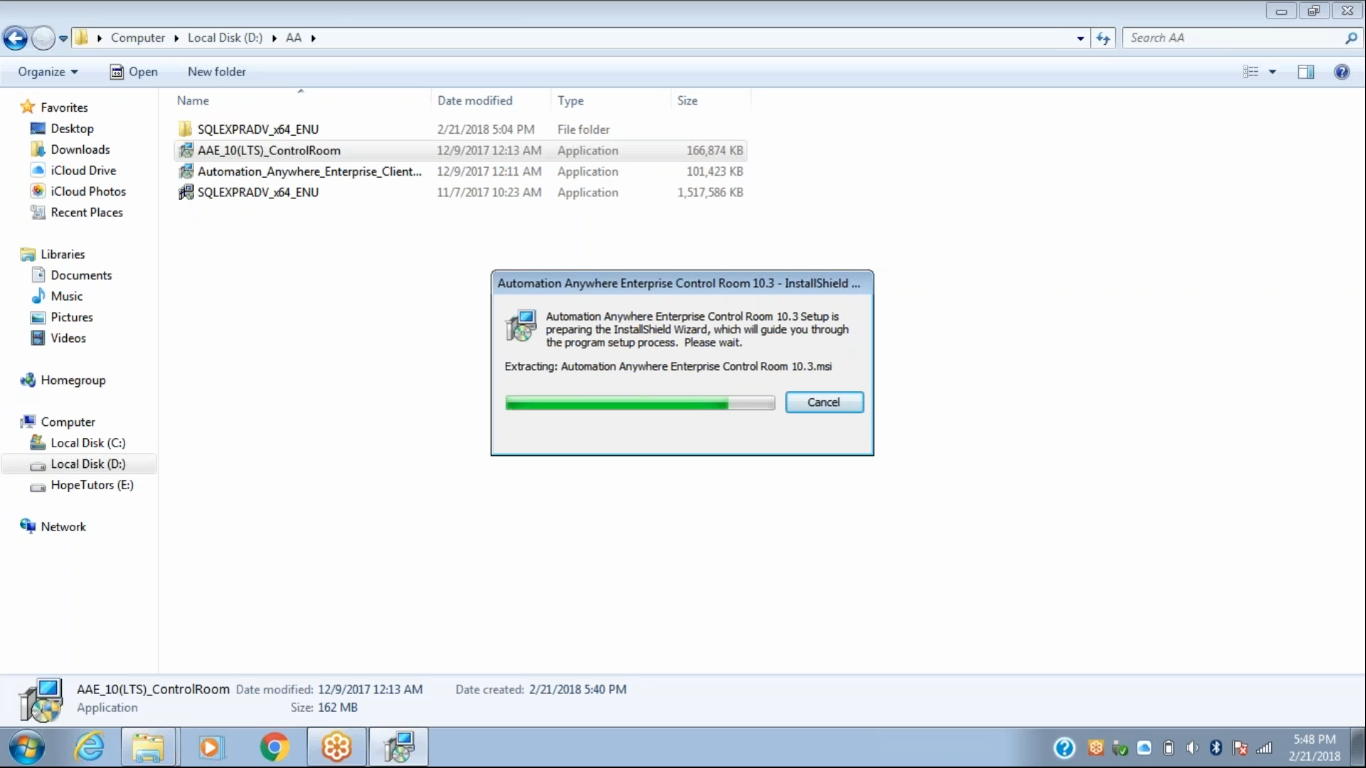
Step 8 – After finishing all the steps we have to double click on the Automation Anywhere software icon which is the second icon from the top in the picture below.
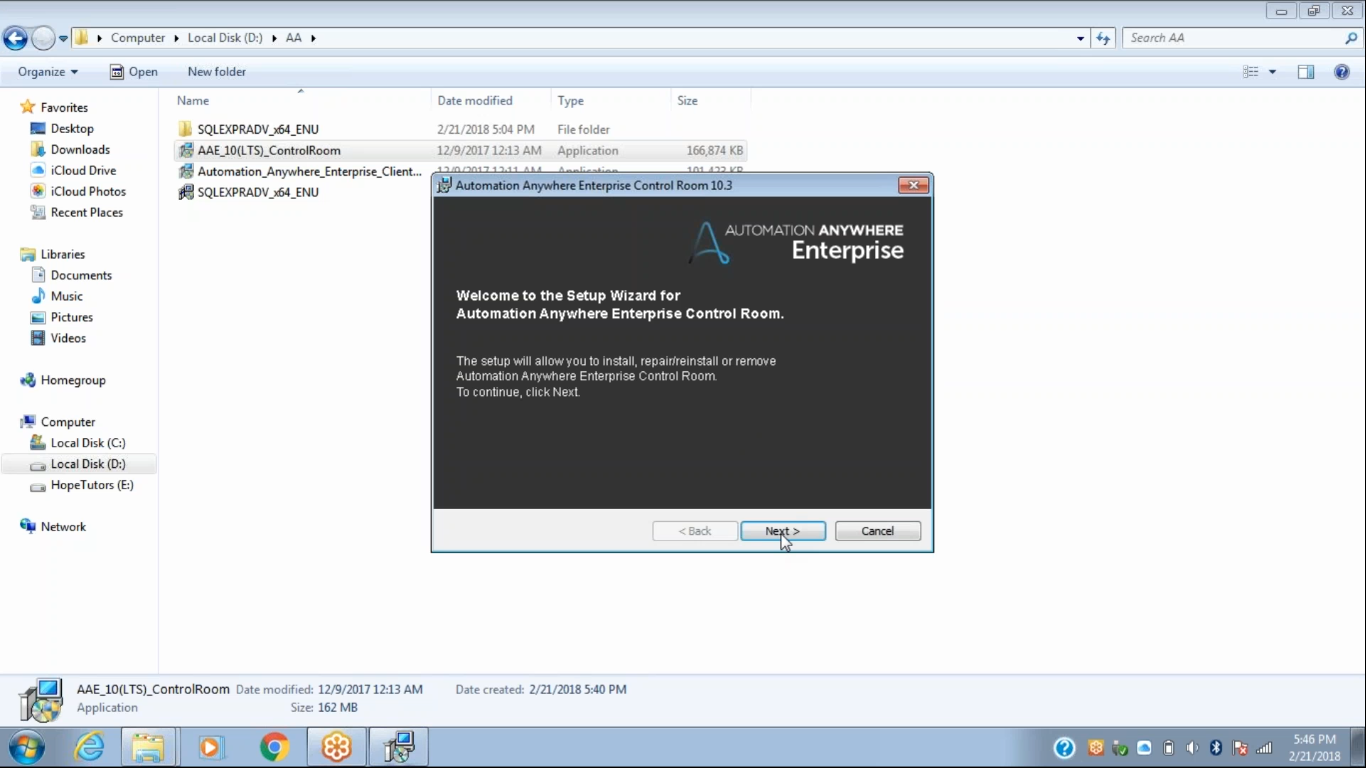
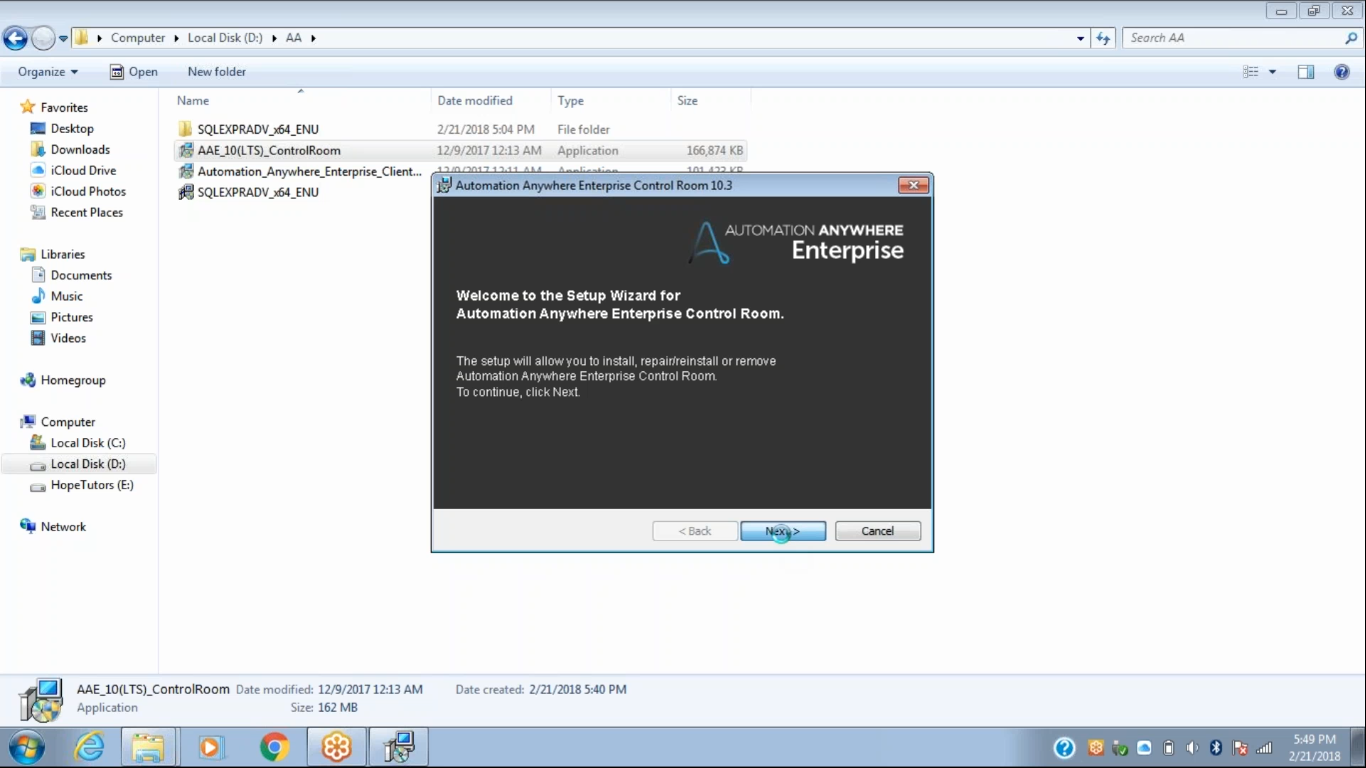
Step 9 – The Install Shield will open and close automatically leading way for the Automation Anywhere Setup Wizard to open. We have to click on the next button.
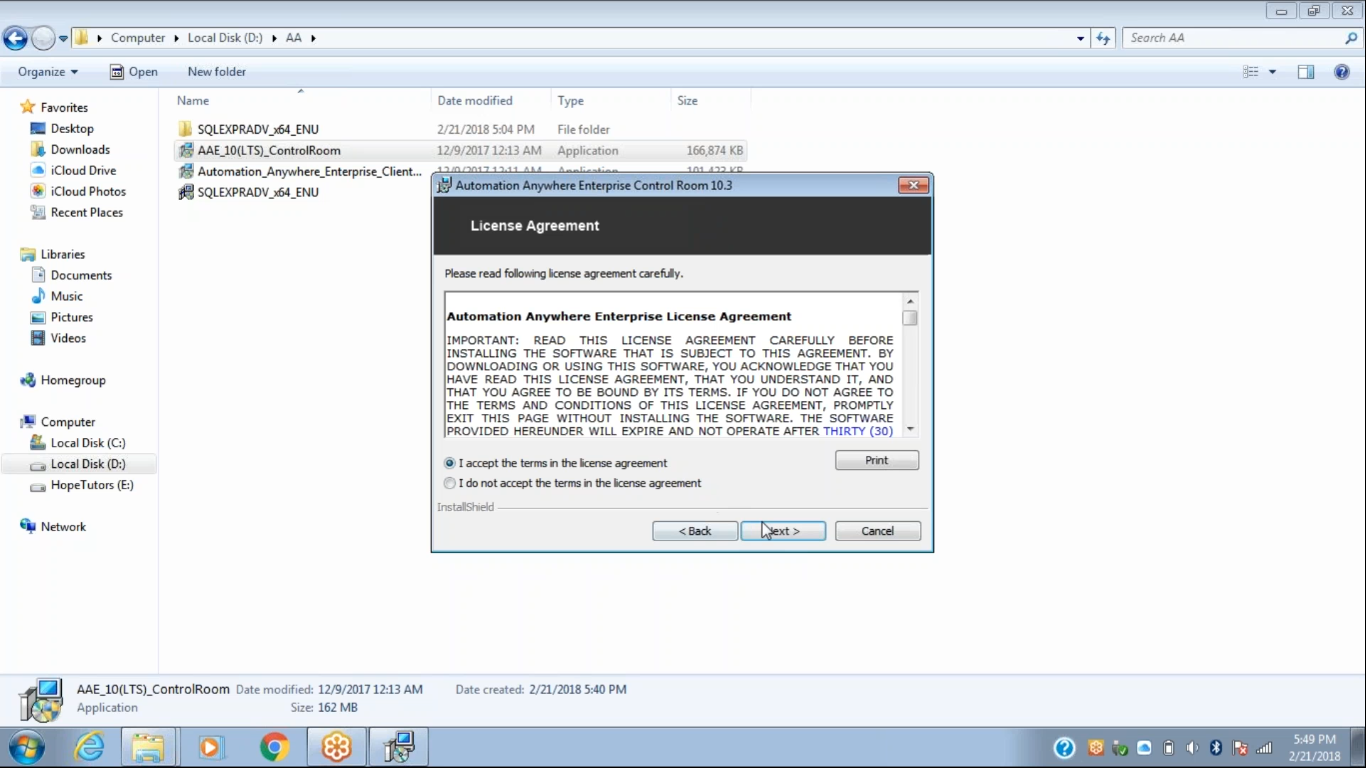
Step 10 – When we click on the next button the License Agreement Window will open. We have to select the option “I accept the terms in the License Agreement”. After doing so we have to click on the next option.

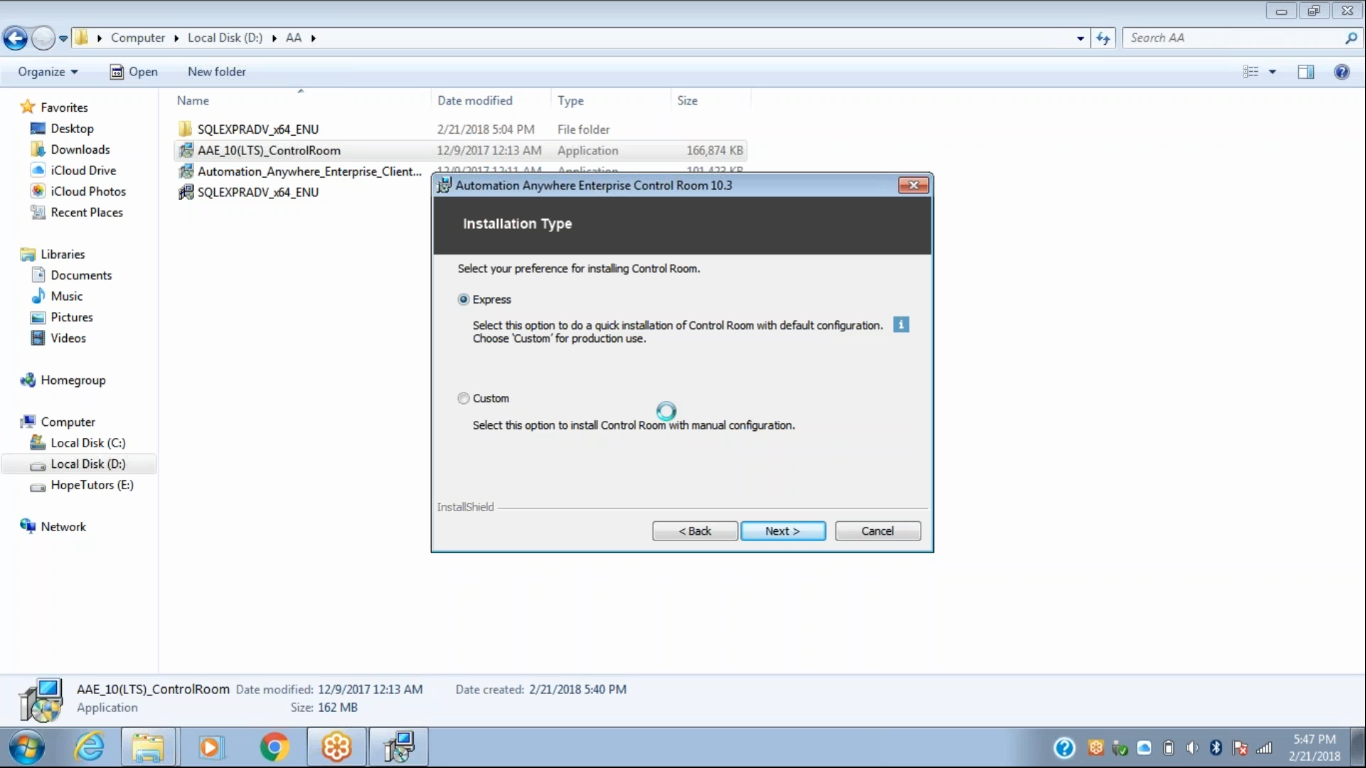
Step 11 – In the next step we have to select between Express and Custom mode of Installation for Automation Anywhere. We have selected the Express mode of installation for this tutorial. After selecting Express we need to click on the Next button.
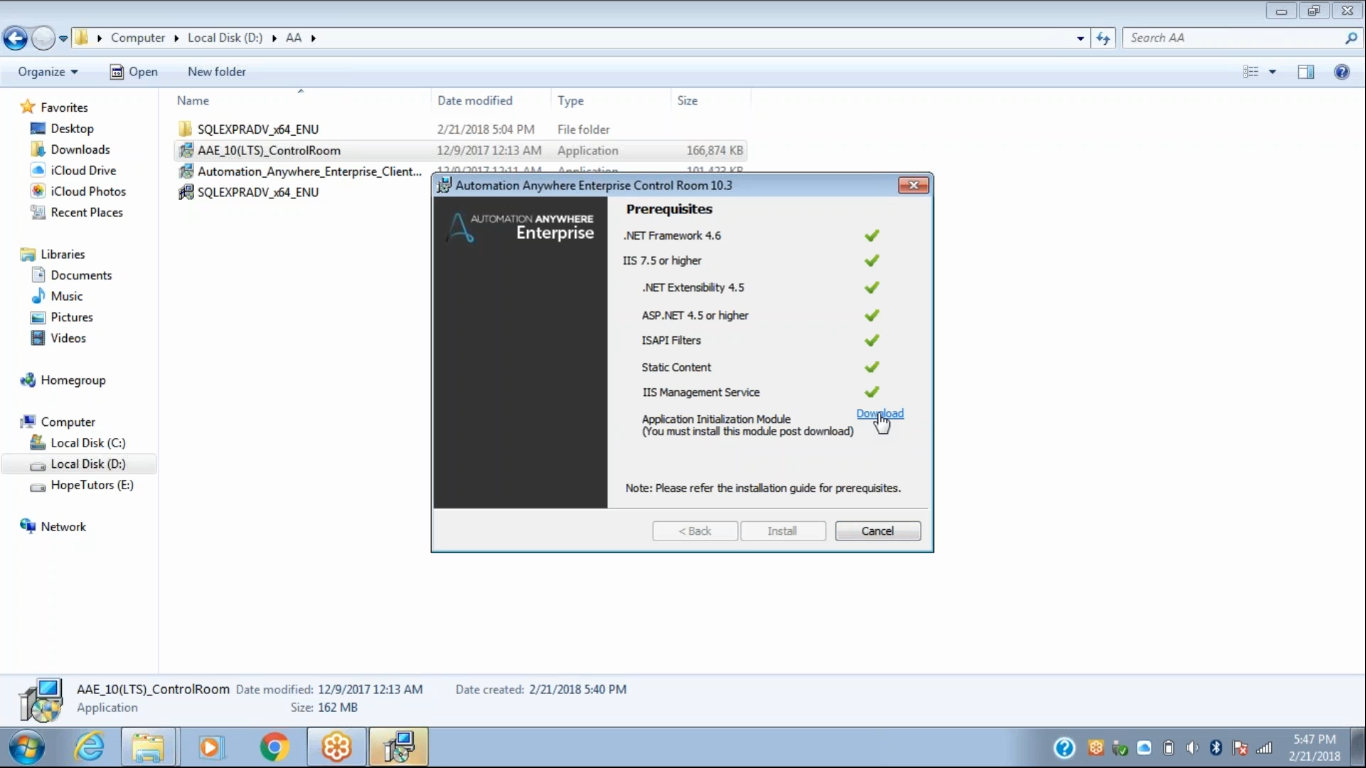
Step 12 – Once we click on the next button the prerequisites dialog box will open. We have to download the Application Initialization module from here by clicking on the Download option.
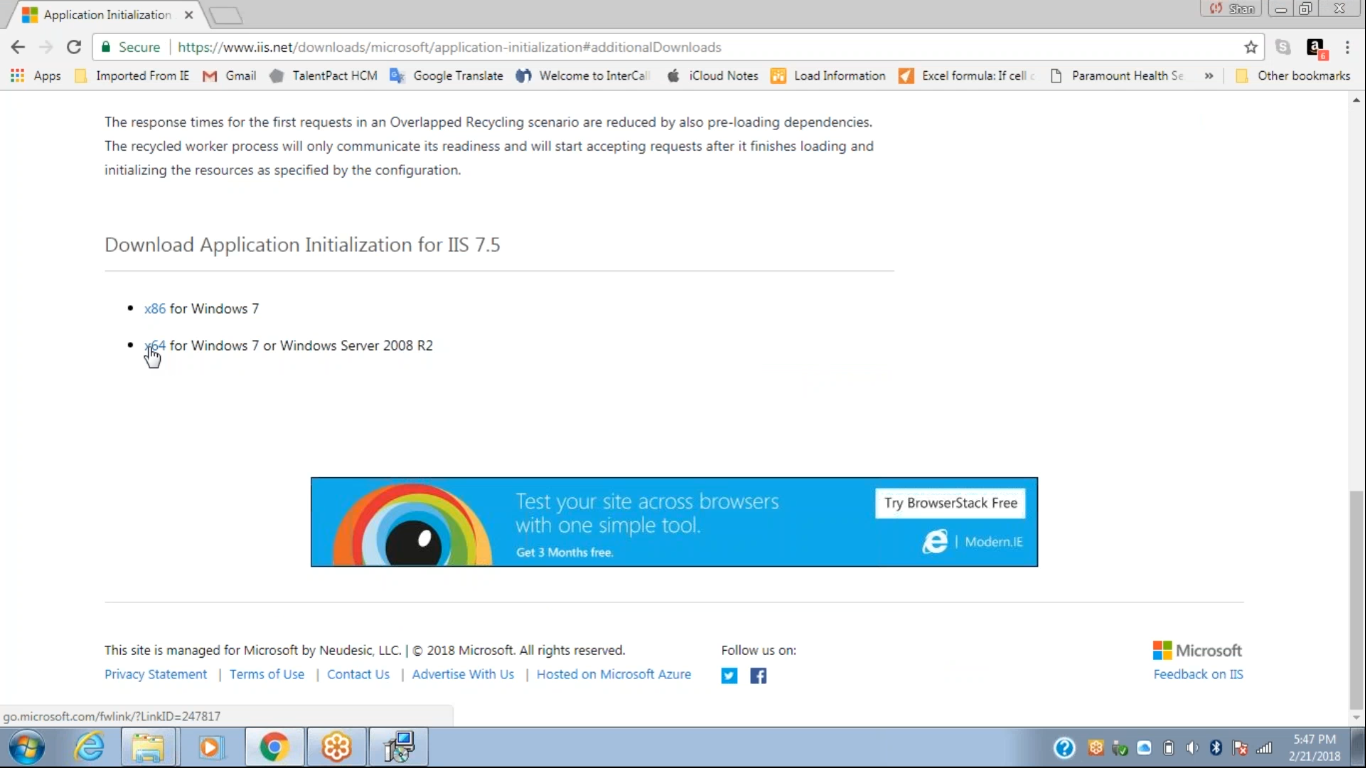
Step 13 – When you click on the download link it will take you to the Microsoft Application Initialization website. In the additional downloads option we have to select the X64 for Windows 7 or Windows Server 2008 R2 option and click on it.
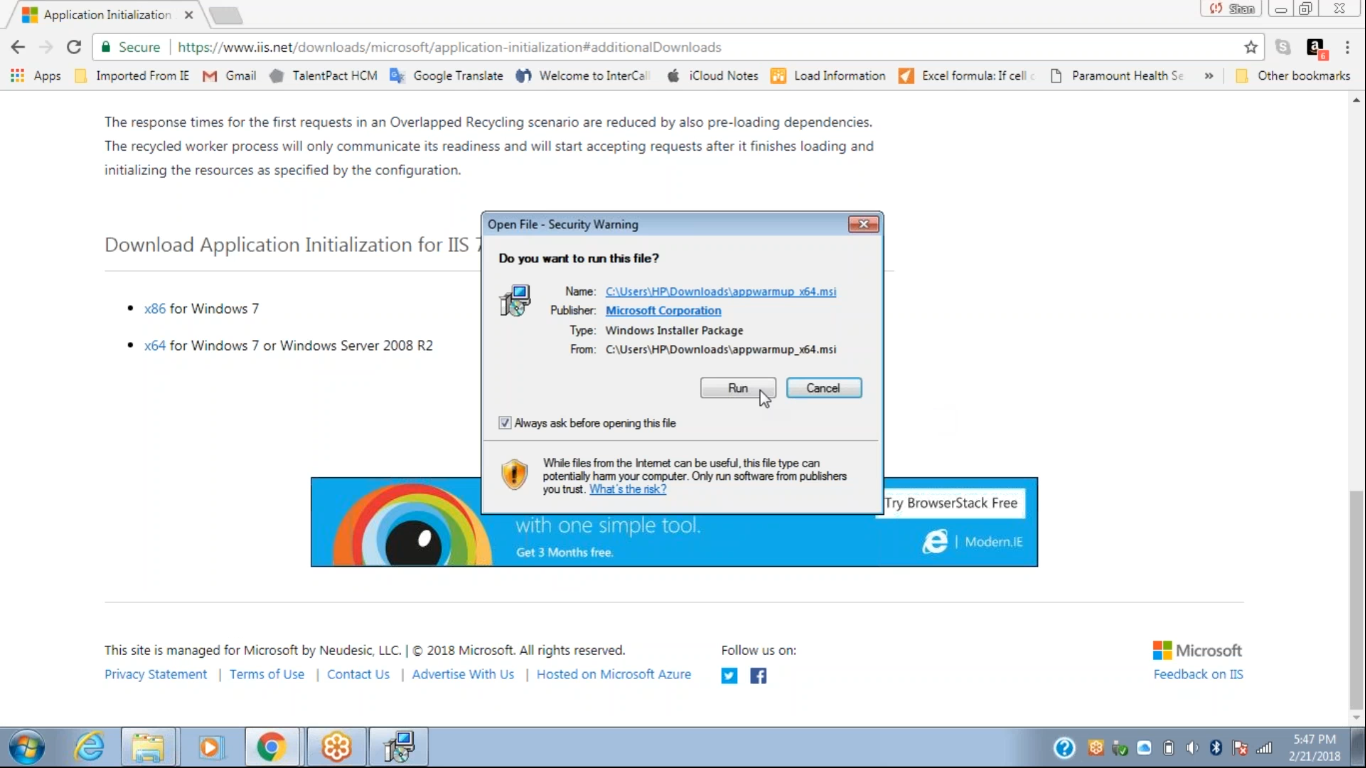
Step 14 – Once it gets downloaded we have to open the downloaded file and then click on the run button.
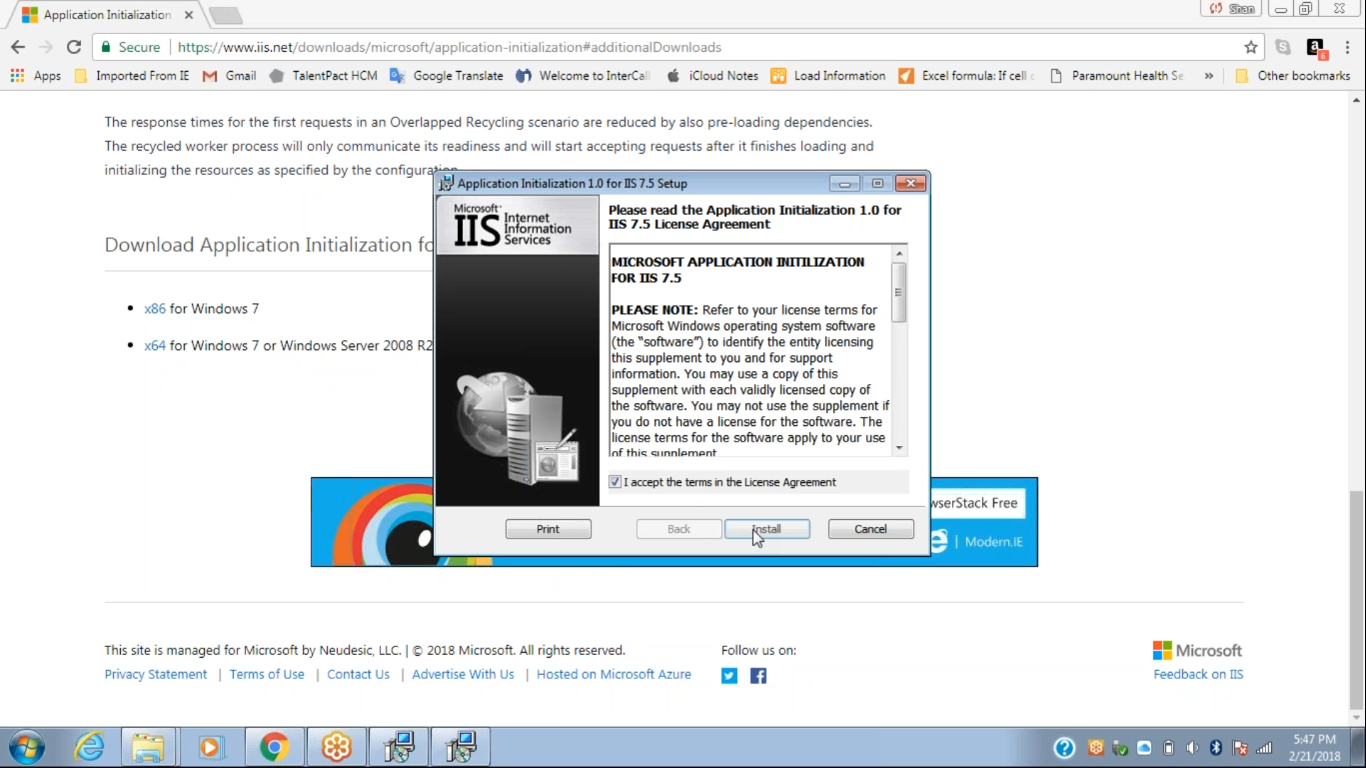
Step 15 – Then we have to accept the necessary license registrations and then click on the Install button.
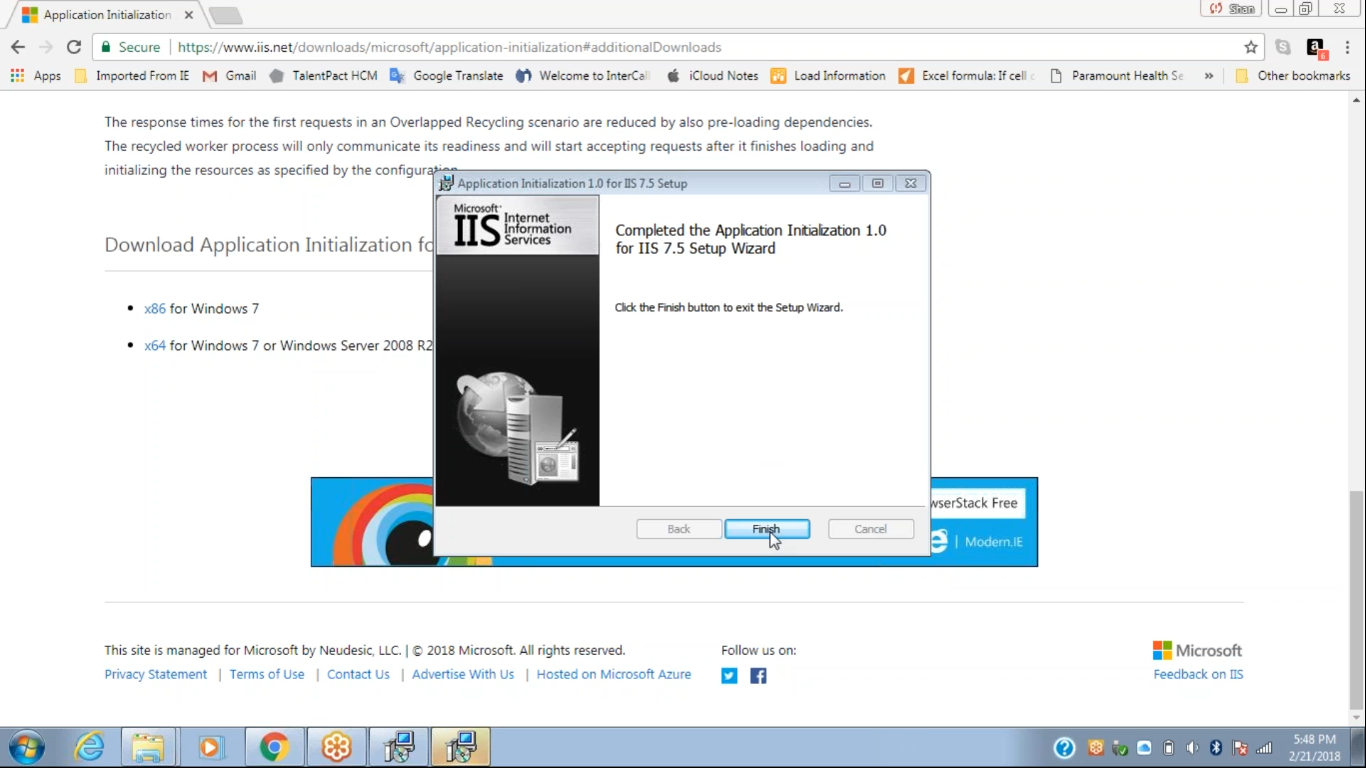
Step 16 – Once the installation is done we have to click on the Finish button to exit the Startup Wizard.
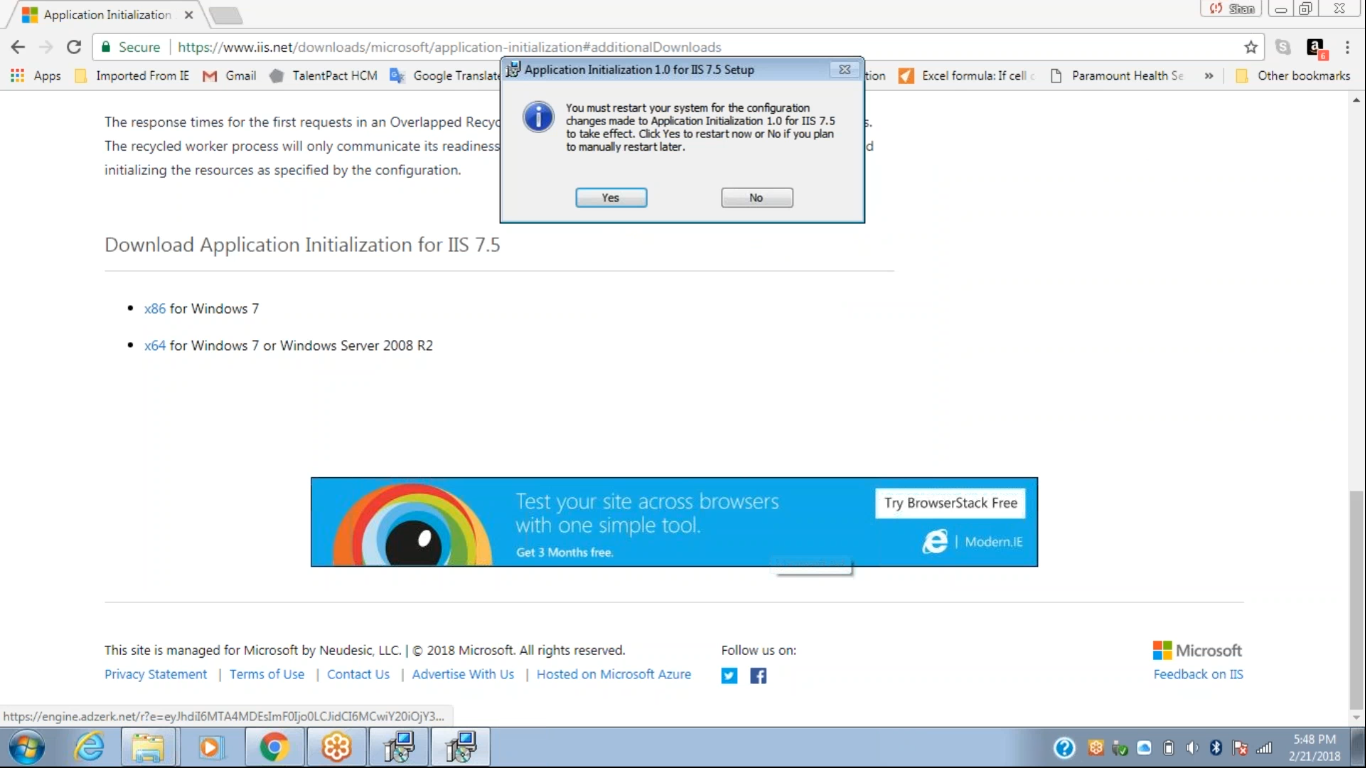
Step 17 – A restart prompt will appear which will ask you to restart your system for the necessary changes to take place. We must restart the system.
CUSTOM INSTALLATION
With the ‘Custom’ mode of installation, we can install the Control Room utilizing our choice of settings. With this mode, we have the agility to choose components for installation – Application or Shared Data & Services or both.
Therefore,
- We can choose our choice of components for installation– Application or Shared Data & Services or both.
- We can configure the Website – http or https.
- We can configure the WebSocket – define port and select certificate (in-case https is enabled).
- We have the option of defining Control Room Database and User Credentials.
- We can choose the path of shared Repository.
- We can define the various user types – Active Directory or Non-Active Directory.
- We can select a path for installation.
Steps to Install Automation Anywhere using Custom Installation Type
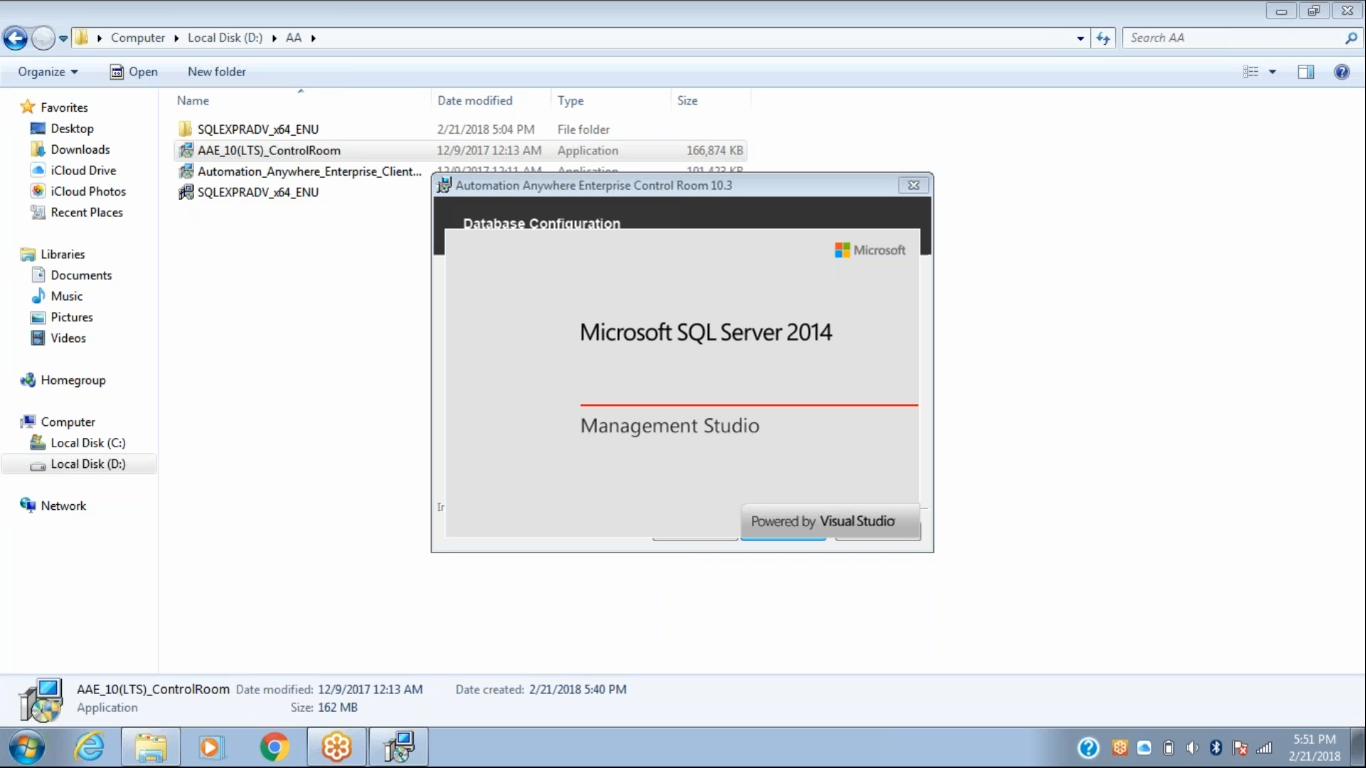
Step 1 – Double click on the Automation Anywhere Software file which is the highlighted file in the picture below.

The next screen that will appear is the one shown below.
Step 2 – After this the Automation Anywhere Setup Wizard dialog will open. We have to click on the Next button.
Step 3 – Once we Click on Next, we have to click on the option which suggests that we have accepted the terms in the license and then we need to click next again.
Step 4 – We have to select the Custom Installation Type and then click on the Next button again.

Step 5 – The Installation Components dialog window will open. We need to select the SHARED DATA AND SERVICES option. Then we need to click on next,

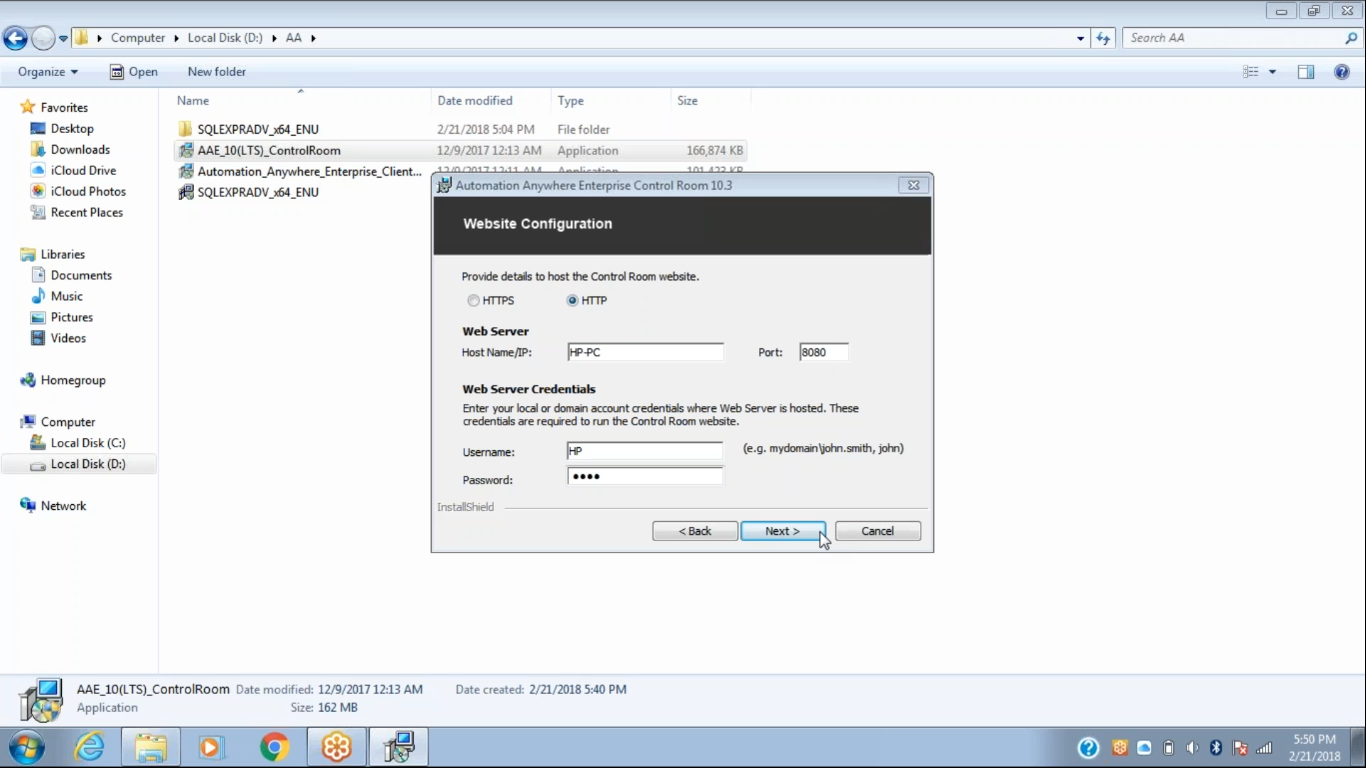
Step 6 – The Website Configuration window will open and we have to click on the Next button.
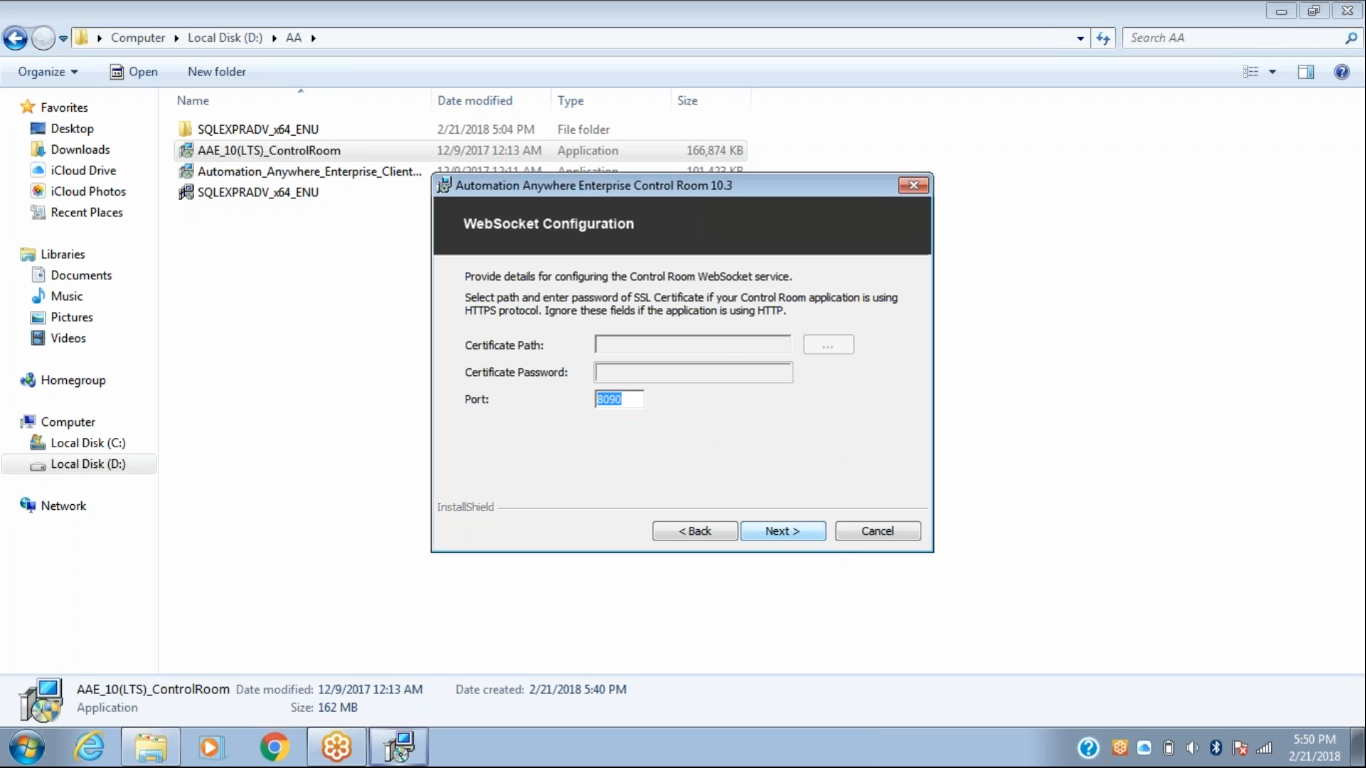
Step 7 – The WebSocket Configuration window will open next. We leave the values as it is and click on the Next button.
Step 8 – After you click next, the Database Configuration Window will open. Leave it open. Use the Windows taskbar to go to the start menu and search for SQL SERVER 2014 Management Studio. Double click on it to open it.

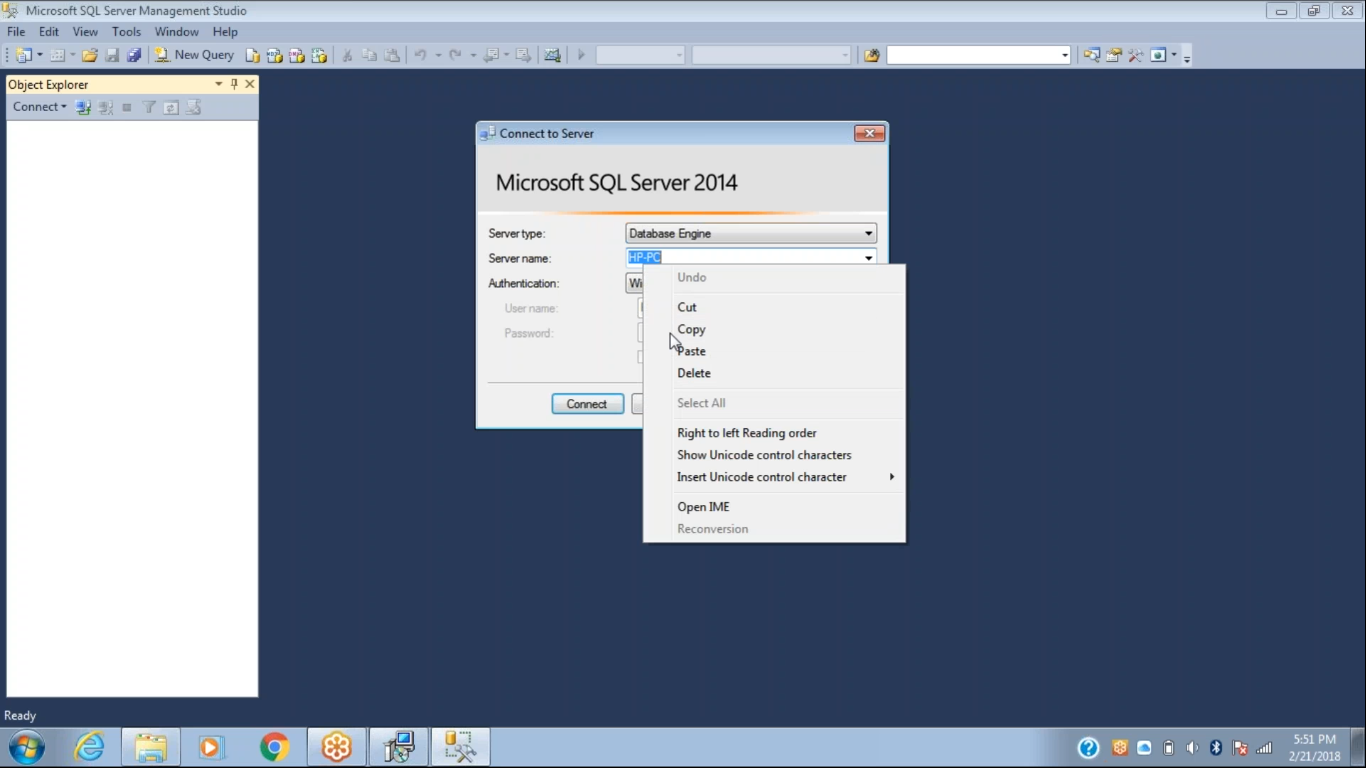
The following Window will appear.
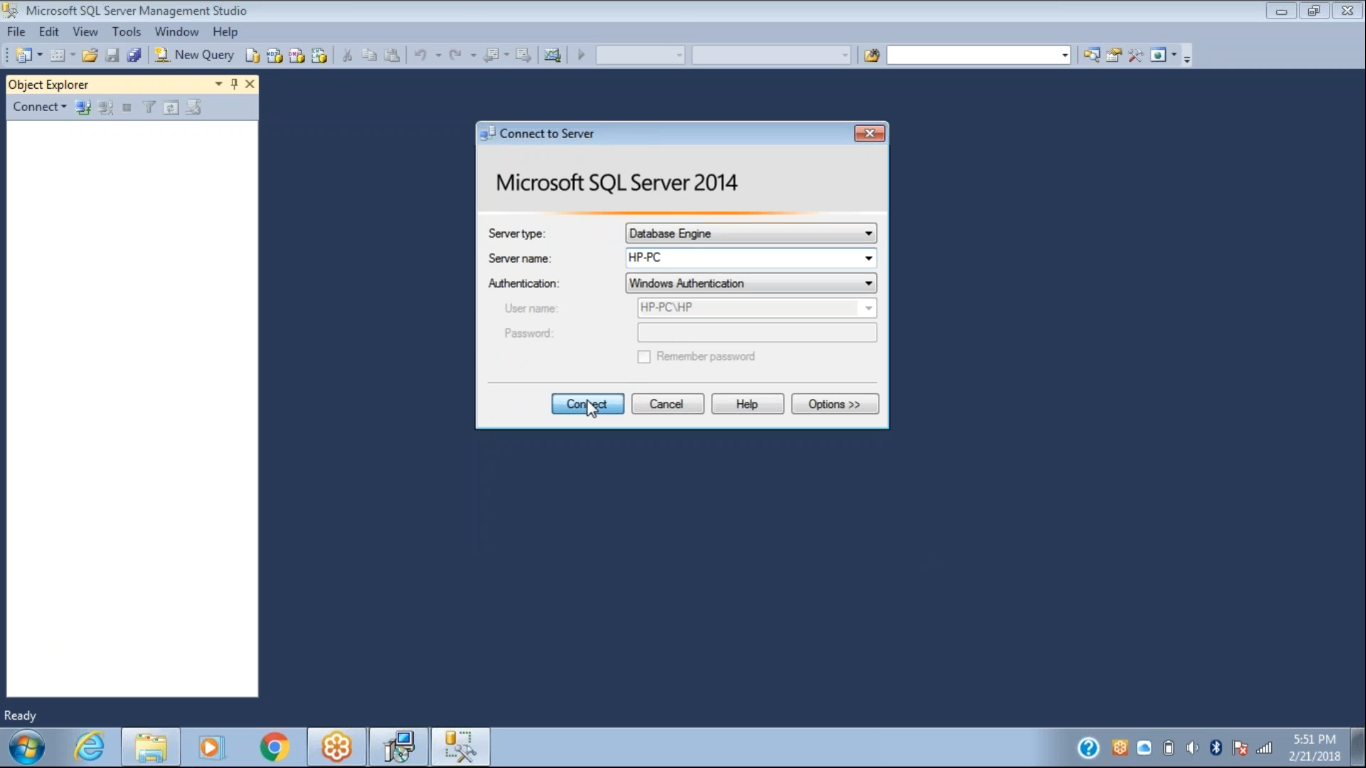
After loading the following window will appear.

Step 9 – Copy the Server Name.
Step 10 – Go to the Database Configuration Window and copy the server name to the server name of the Data Configuration Window.
Step 11 – Click on the Connect button in the Server Management Studio.
Step 12 – The Object Explorer will be ready now. We have to right click on Databases in the Object Explorer and click on New Database.
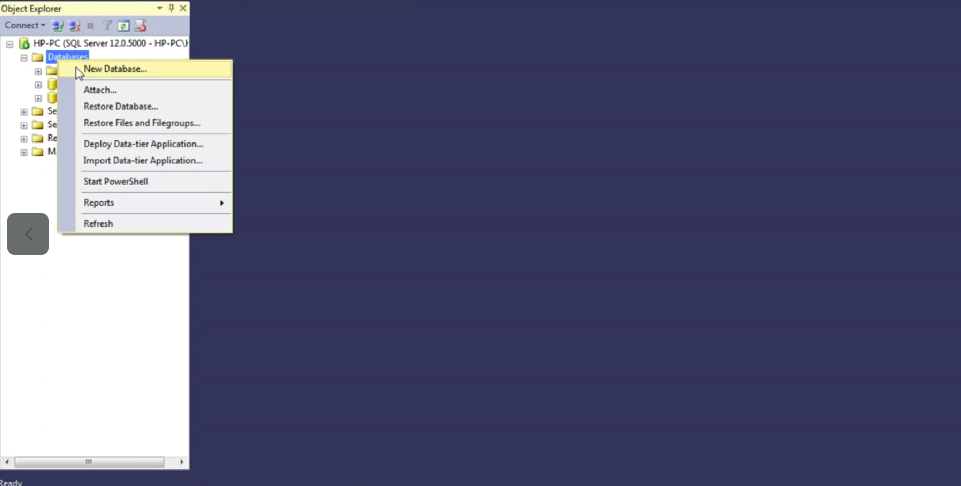
Step 13 – In this tutorial we have given the name of the Database as AA. The next step is to click on the OK button.
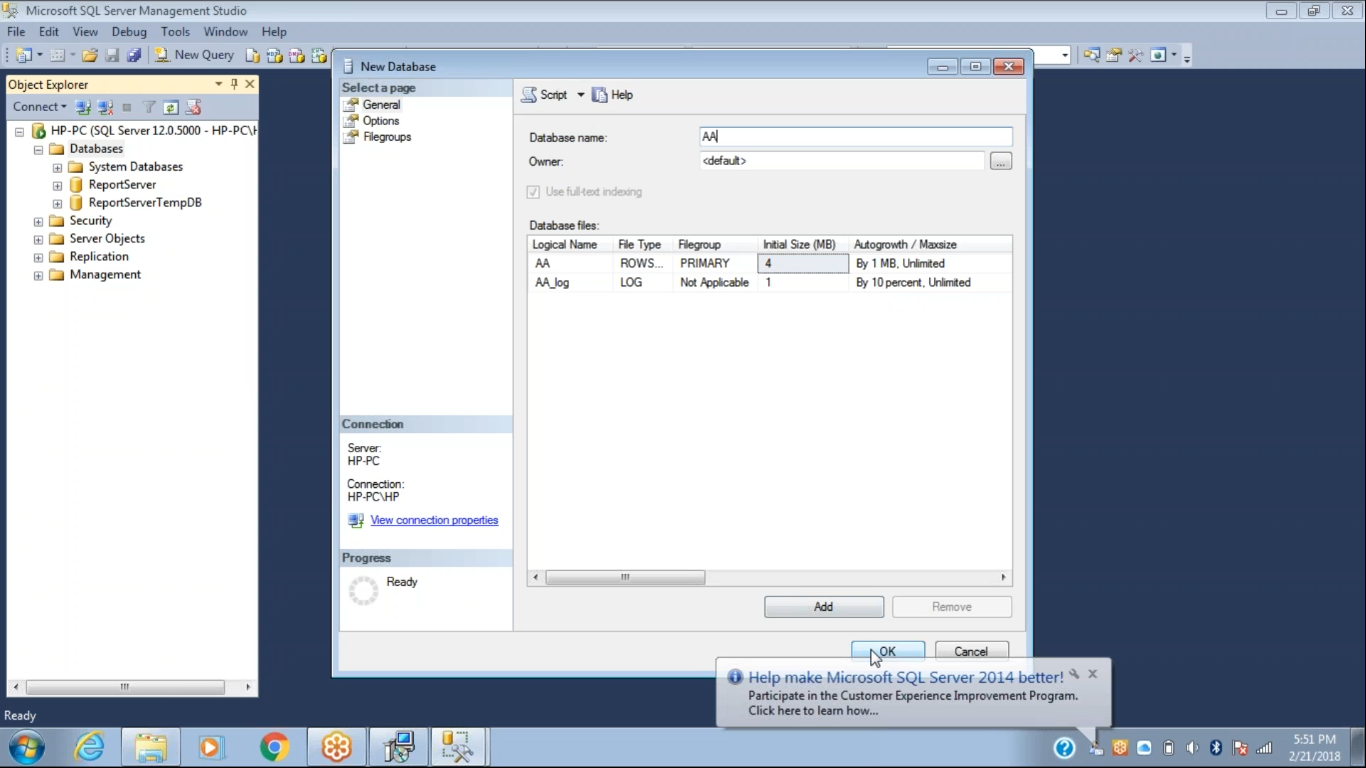
Step 14 – Now go back to the Database Configuration Window and enter the server name as HP-PC. We have to enter the database name as AA and then click on the next option.
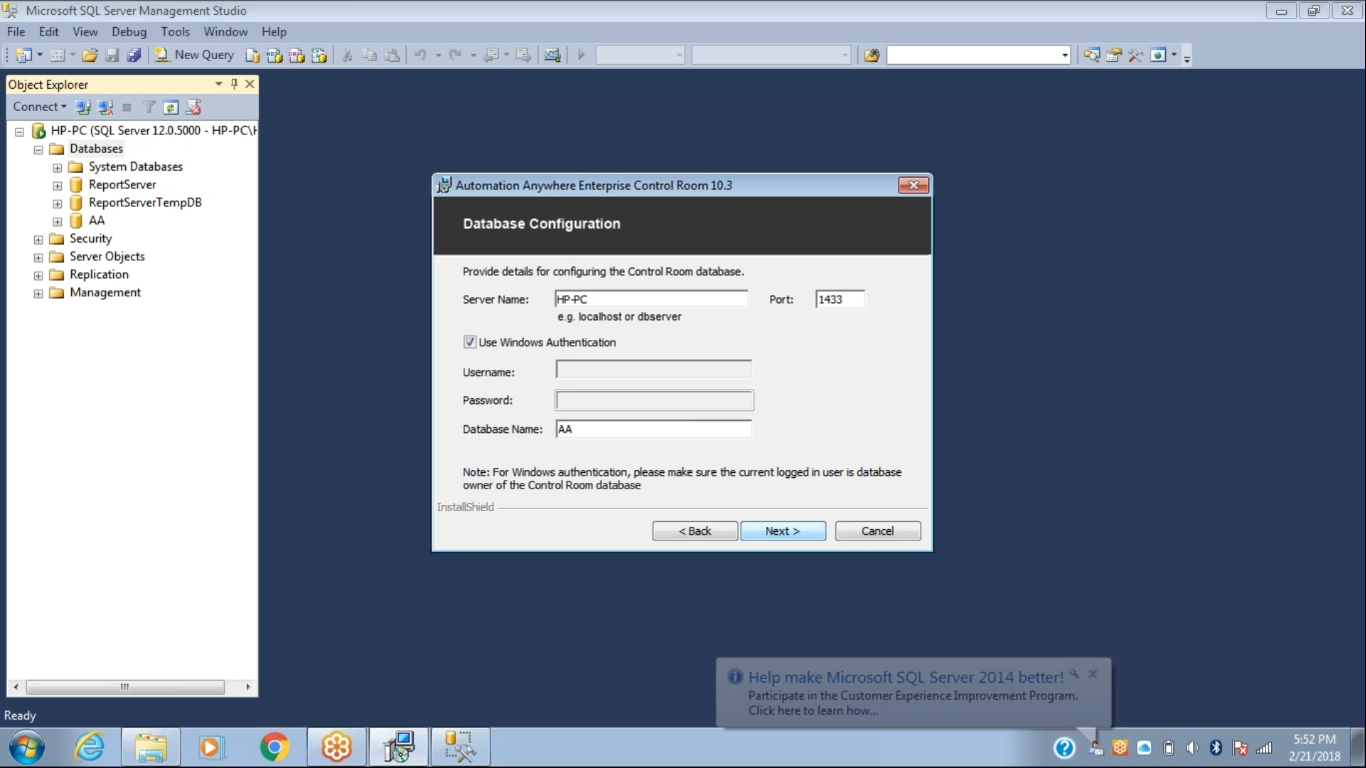
Step 15 – Once we click on the next option, the User type configuration Window will open. Select the non active directory option and click on next.

Step 16 – We need to click on the next button as shown below.

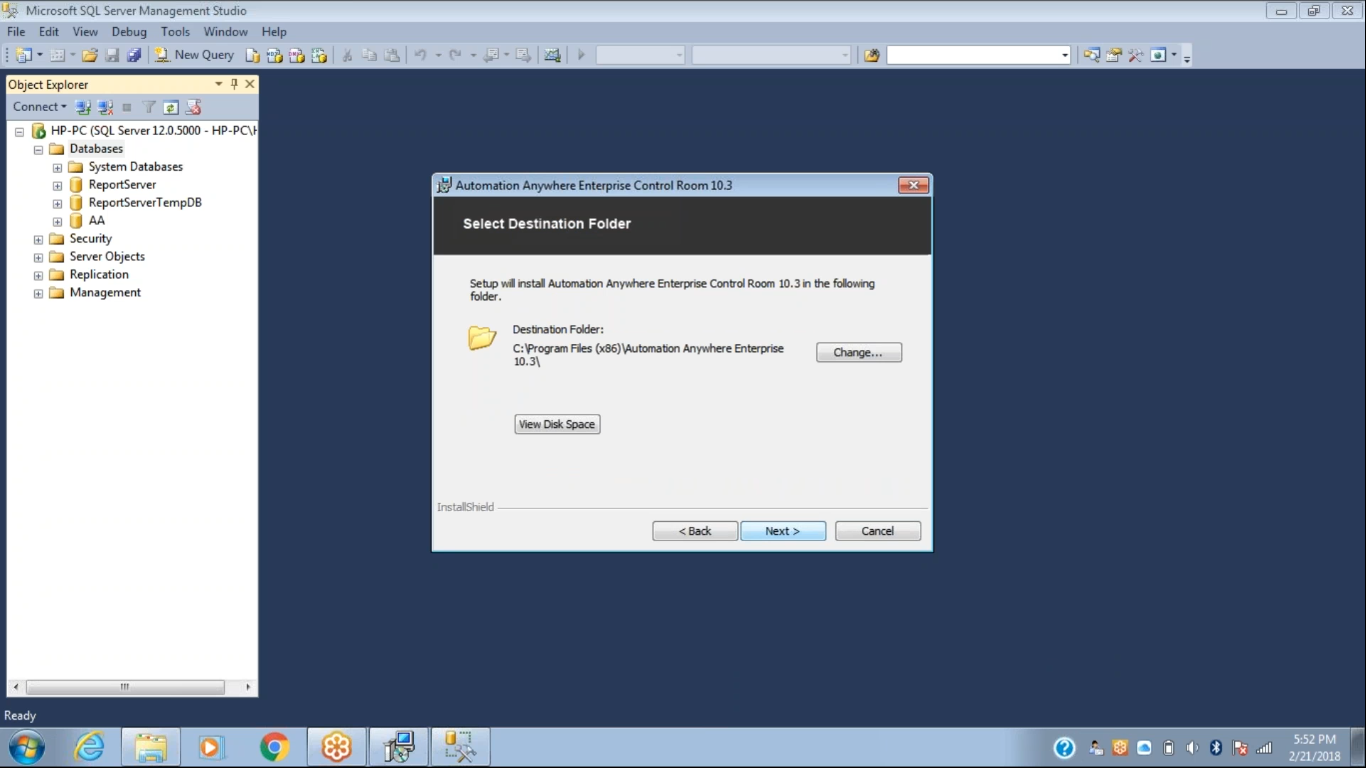
Step 17 – We need to select the Destination Folder and click on the next option.
Then we need to click on the install button as shown below.
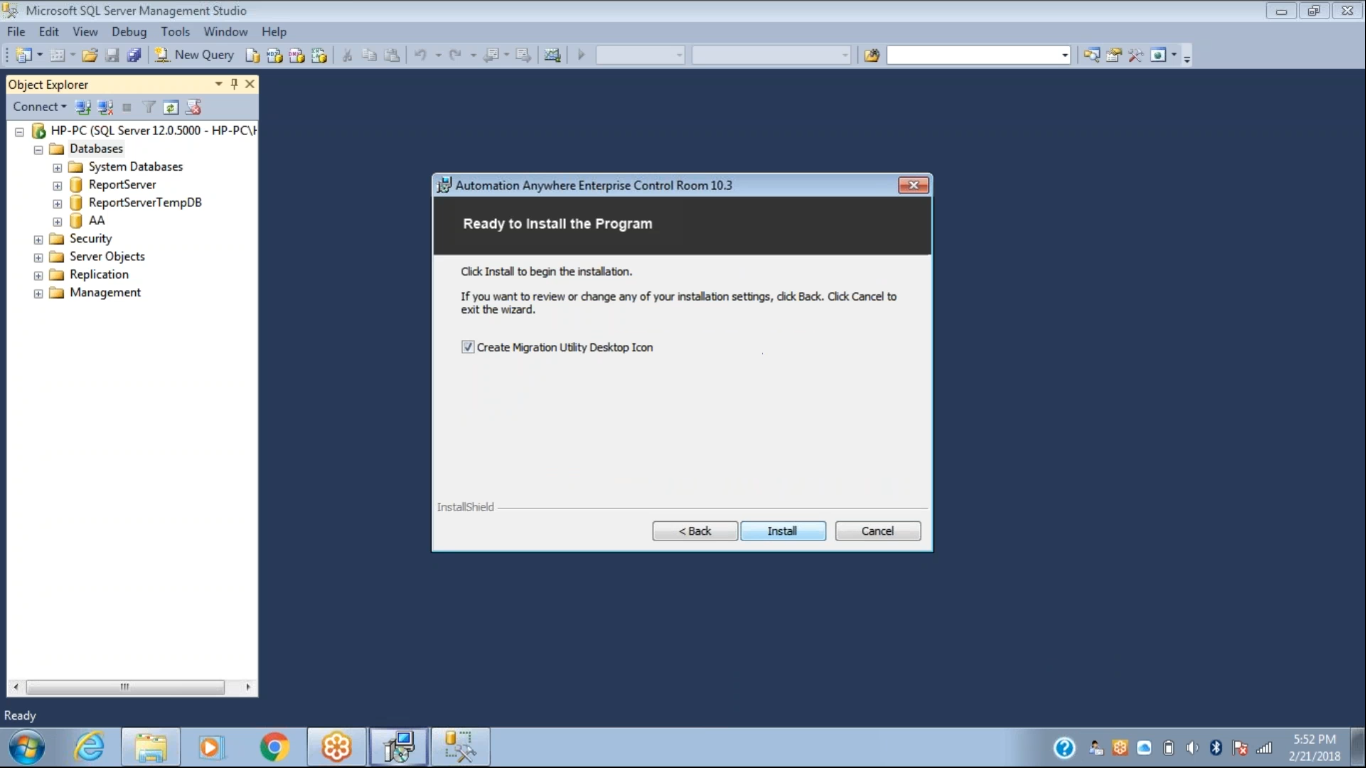
Now the install shield wizard will install Automation Anywhere into your system.
Learn Corporate interview modules
In today’s competitive market, it is not just sufficient to possess knowledge. It is important to showcase your know-how and be able to deal with stressful interviews to land the dream job you have been training and waiting for.
Hope Tutors offers a variety of Corporate interview modules that are part of our Corporate Training programs. It helps prepare participants for both internal promotion interviews and interviews at a new firm. We take them through the hiring process and test them to find potential strengths to capitalize on and weaknesses to address. They are coached through the technical niche with strong application capabilities to be displayed at the interview. We offer them communication tips to be confident and sail their way through interviews, effectively turning them into high-potential candidates that employers would compete to hire.